Friday, March 31, 2006

First Harvest

Today I harvested my first baby lettuce from some of the lettuce plants that I'd started inside the house and planted in the cold-frame. It wasn't much, but as I ate it I felt gardening season had begun.
The lettuce, broccoli raab, and baby spinach seeds that I planted in the cold-frame last week have already sprouted and will soon need thinning. From my temperature readings, I have noticed that the cold-frame nightly low is staying about 9 or 10 degrees warmer than the low temperature outside of it. This would mean the the low temperature approximates late April temperatures instead of late March temperatures. I think if I'd finished the cold-frame sooner I could have started planting lettuce sooner. That will be an experiment for next year.

Thursday, March 30, 2006

Spring Bulbs

The weather warmed up into the upper 60s today, and the spring bulbs are starting to come on strong.

The crocus flowers are starting to lose their petals.

The spring iris bulbs are at their peak,

and the narcissus, hyacinth and tulips are ready to burst forth.

Tuesday, March 28, 2006

Tomatoes Tomatoes Tomatoes

The tomatoes at the top of the picture are the same ones that I was transplanting to bigger pots in this POST three weeks ago. Although I planted them much too early, I am still surprised at how large they've gotten. They were part of the fertilizer experiment the I described. I had to end the experiment early because it was taking up too much room. Because I did not want to mix the fertilizers, I had separate drip pans under each cell pack of 4. That was taking up too much valuable space. The plants fertilized with manure tea, organic plant-tone and organic fish fertilizer were all doing equally well. Not surprisingly, the control group plants that received no fertilizer were smaller. Some of those control group plants are in the second row from the left in the photo. The tomatoes were planted so early that it's not really a problem that the control group is smaller. They have all been transplanted again from 4 cell packs to 3 inch pots and look great. However they can not be planted outside for at least 7 more weeks here in Massachusetts! As soon as the nights get a little warmer though, they are headed out to the cold frame.

You may notice there are also more smaller tomatoes on the bottom of the picture. Those were a gift from my neighbor. He was telling me about some delicious purple tomatoes he grew last year and asked me if I wanted some seedlings. I can't refuse tomatoes and told him, yes that I'd love to try one ot two. Well he went into house and came back with a whole flat that had 8 purple tomatoes and four other varieties also. He said he was running out of space in his greenhouse. I wish I had a greenhouse in which to run out of space. How could I refuse. They are tomatoes. Is is possible to have too many tomatoes. I don't think so.

Sunday, March 26, 2006

Training Kahlil

More Weekend Dog Blogging over at Sweetnicks later tonight


In the past Kahlil was good around chickens, but when I was laid up with pneumonia last spring and he wasn't getting enough exercise or work, he developed the bad habit of chasing the chickens. Chickens who are chased, freak out which just excites the prey drive of the dog who is chasing even more and reinforces the dog's bad behavior. Kahlil caught the white hen and managed to pin her down and pluck out lots of feathers, and dislocate or break her leg. The yard looked like a pillow fight had taken place that day there were so many feathers strewn about. I nursed the hen back to health, and except for a strange gait, she's none the worse. However I then knew Kahlil could not be left with chickens without some serious re-training. Recently, I've been having Kahlil work among the chickens with me inside on a lead. This seems to be easier that being outside. Inside both the hens and Kahlil remain calmer for some reason. He is not at all trustworthy yet so he is always on a lead, just in case. Below you can see he is among the chickens, and ignoring them while on a loose lead. All is going well, well enough that I took about 10 pictures.
The last picture in the series is below. I can not be sure if he is giving the black chicken in front of him the eye or just sniffing at the ground, looking for food. What happened next, happened kind of fast. I think the black hen on the right felt trapped and started flapping. It startled me. It startled Kahlil. As a reflex, I pulled back on the lead. His collar slipped over his head. The hen ran. Kahlil chased. I somehow caught Kahlil, despite him having no collar and slipped the collar back on, and took him out of the pen. The collar did not slip off accidentally. Kahlil has a small head and knows just how to slip out of a collar if the collar is not fastened tightly. Form my reading I know that a behavior can not be extinguished if it keeps happening and the behavior in itself is reinforcing. Today I also learned to make sure his collar is tight when trying this again. Ultimately the goal if for the chickens to freak and flap about and for Kahlil to remail calm and not chase. I may take a different approach. I may work on down/stay with all kinds of distractions, ultimately leading up to the distraction of flapping chickens. I believe he can ultimatly succeed. He loves to chase, but does NOT chase running children so I believe not chasing chickens is possible. Maybe eventually he'll help me learn how to be good at dog training.

Friday, March 24, 2006

Artichokes Day 20


A friend and I have decided to try to grow artichokes this year. Until last year I thought it was impossible to grow them in Massachusetts. However, I saw someone else growing them last year and now we're taking on the challenge. They need to be vernalized which means that they must have a cold period of a certain length. You can read about vernalization of artichokes HERE. My friend bought the package of seeds. I took 10 seeds and she kept the rest. I will vernalize outdoors and she will split her seeds into two groups. One she will vernalize in the refrigerator and the other group she will vernalize outdoors. Vernalizing in the refrigerator is much easier because it can be done to the seeds. Vernalizing outdoors must be done to the plants and is much more of a pain in the neck and could fail if it gets too hot out. Naturally vernalized plants are supposed to produce more buds though. Of the 10 seeds, I lost 2 and planted the other eight. Five germinated. The photo above shows three of the five plants 20 days after sowing on the day they were set out. Not very impressive is it? If we are threatened with a killing frost I will have to move them into a cool place. I can't bring them back to live in the warm house or they will break vernalization! I put one of the artichoke seedlings in the cold-frame. It will get too hot in the cold-frame to keep the plant vernalized, but I like breaking the rules to see what will happen.

Thursday, March 23, 2006

Cold-frame Vent Works

In the previous two days since I plugged the cold-frame leaks, it has not gotten warm enough in the cold-frame to determine if the automatic vent mentioned in this POST worked. This morning I was watching the remote thermometer, but got distracted. When I remembered it and looked it was 92F! Fearing that the plants inside would start to cook and also a little disappointed that the vent hadn't worked, I ran out to open the cold-frame lid. As soon as I got out. I realized why the vent hadn't worked. Just an hour earlier I'd put a brick on top of the vent window to push the main window tighter against the foam rubber. Somehow I didn't realize that this was not a smart move at the time. I took the brick off and the vent window popped open. When the sun went in and the cold-frame temperature dropped back into the 70s the window closed. Yipee it actually seems to work I'll be checking it over the next few days to insure that it's continues to work before I'll trust it enough to go off to work on a sunny day and lets it do it's job. Below you can see how it's opened just a little crack. The amount that the window opens seem related to the temperature rather than just being all the way opened or closed.
The vent is adjustable. The present setting seems to open it when it reaches the low 80s. I'm not sure if that is too cool, too warm or just right. I'll have to see how the plants do.

What's blooming inside today,
and what's blooming outside today.

Tuesday, March 21, 2006

Cold Frame - Leaks

Today I plugged the leaks in the cold-frame. The only thing I could think of using was foam rubber. I'm not sure how it will take the moisture, but there was nothing else I could think of using. I scrounged up some left over pieces from a project of my mothers. I cut it in strips and stapled it onto the frame where the doors rested. It seemed to work. You can see some between the two windows below.
With one door open you can see it around the frame forming something like a gasket. Over to the left of the cold frame is a small pile of chicken litter. Even though I hadn't gotten a chance to wet it down, it had started to compost and heat up. I think I'm going try to put about 6 inches of litter in the bottom of the frame and see if I can get it to produce some nice bottom heat for my plants. Another thing you can see inside is gallon jugs. The are filled with water with food coloring added. Their purpose is to store heat. I added the food coloring to make them darker so that they might absorb heat faster. I could have painted them black, but that would have been more work than I'm willing to do. I stapled the plastic to the cellar window frame and plan on opening the cellar window if the temperature dips too low in the cold-frame. People have pointed out to me that I could also run a light bulb out the cellar window for warmth. If I did that I'd actually have a hot box not a cold-frame. If it gets too cold, that may be a good option though. I still haven't been able to see if the automatic vent works. Now that everything is tightened up maybe tomorrow it will warm inside the frame to trigger it. I've got the remote min/max thermometer in there now so I'll know soon just how hot and cold it's getting insode. I really would like to start moving some seedlings out into it soon, bit I want to wait a bit and make sure i wont cook or freeze my seedlings.

Sunday, March 19, 2006

Dewclaws - Yes or No


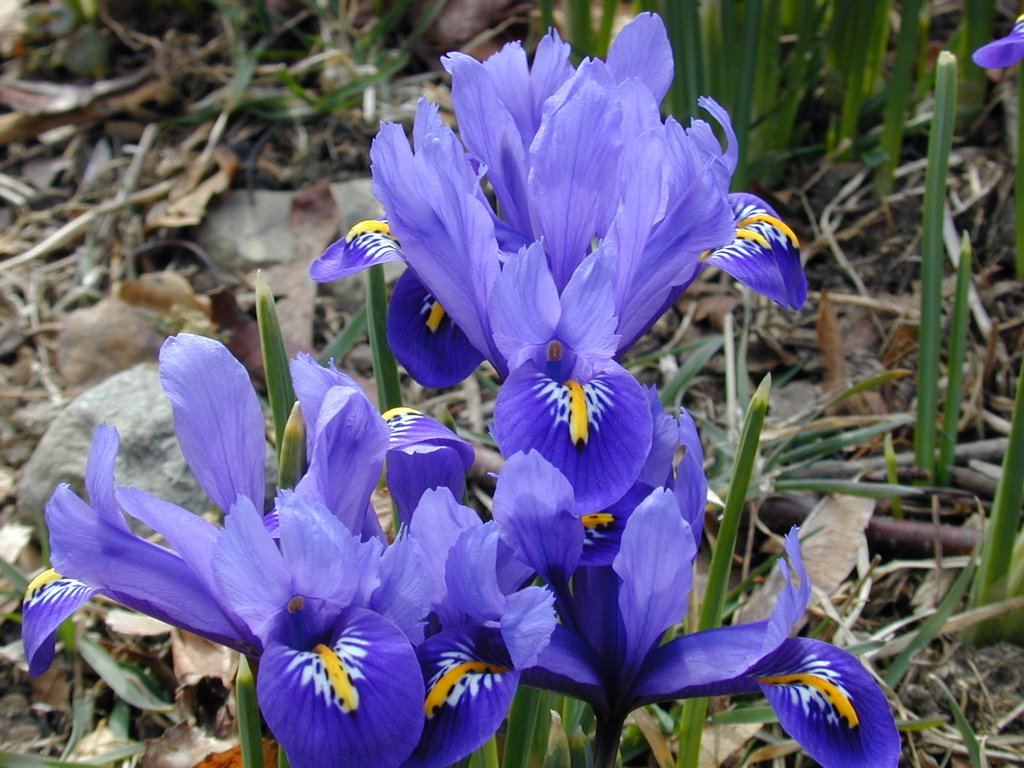
Don't' forget weekend dog blogging over at Sweetnicks later today.

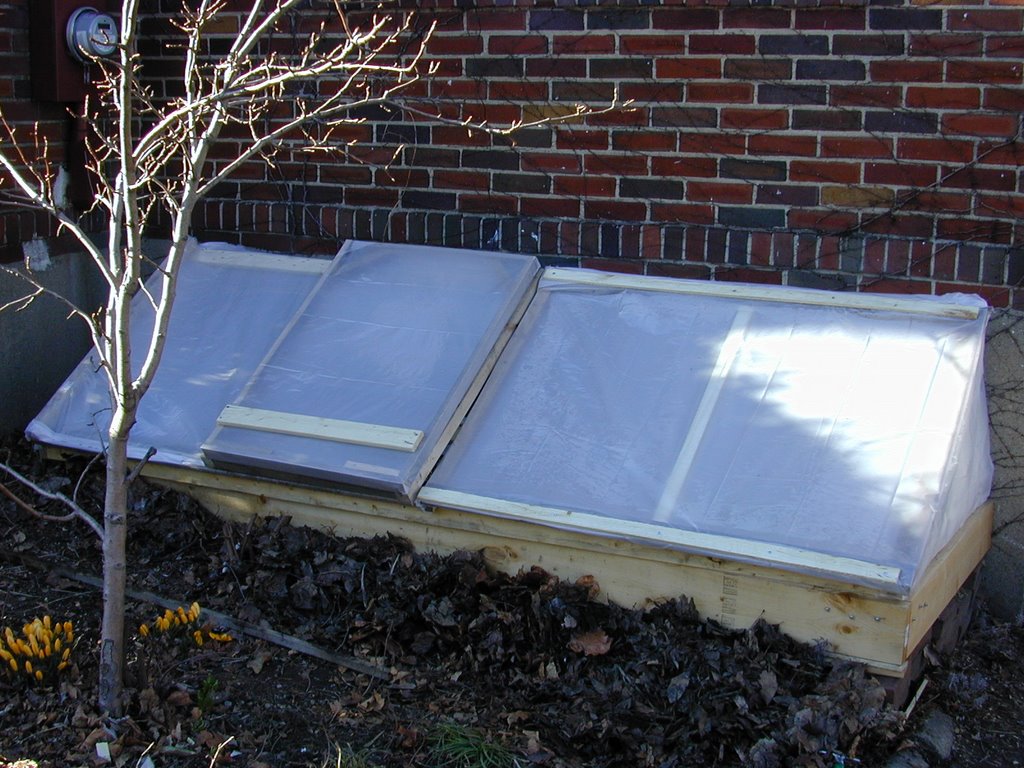
I've decided that today instead of continuing on the cold-frame topi I'll save that for a later post and write a dog post instead. Reading Walter's POST this morning about one of his dogs, Kavi at Sugar Mountain Farm made me think of dogs and dewclaws. He did not mention dewclaws. Rather, part of what he wrote about was his dog's manipulation of objects. That reminded me of dewclaws and their role in manipulation.

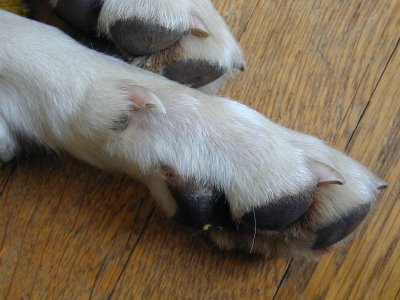
Dewclaws are the fifth claw on a dog's leg. They are usually higher than the other claws. Most dogs seem to be born with them on their front legs and a few even have them on their back legs.

Often breeders will remove the dewclaws when the puppies are only a few days old. All of the dogs I've owned before Kahlil have had their dewclaws removed. There is a difference of opinion on removing dewclaws as a web search will show. Before I got Kahlil, I didn't give it much thought. Now that I've had one dog with dewclaws and many without, I am in favor of leaving front dewclaws on. There is the possibility of catching a dewclaw in brush or on other things and causing injury. However, after watching Kahlil manipulate things with his paws, I see just how useful dewclaws are for a dog. He uses them like thumbs. I now see no reason to cut off a useful body part simply because it may catch on something and get injured. If that were the case most of us would be without our little toes and either we would have to remove zippers from pants or... well I don't want to go there.

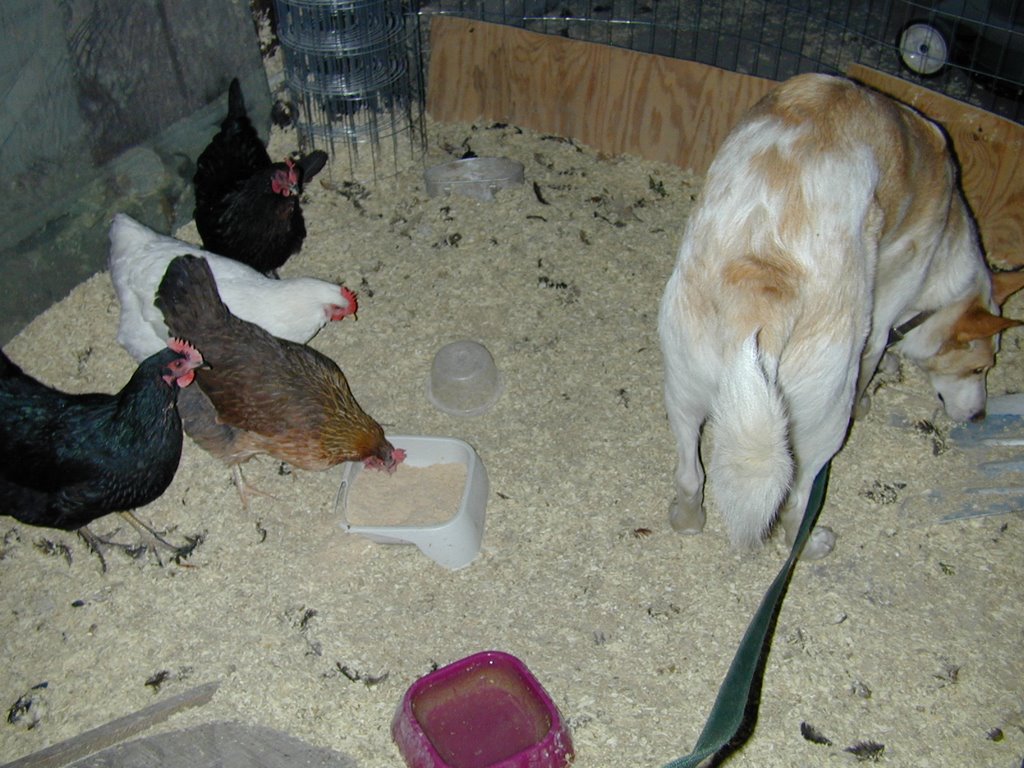
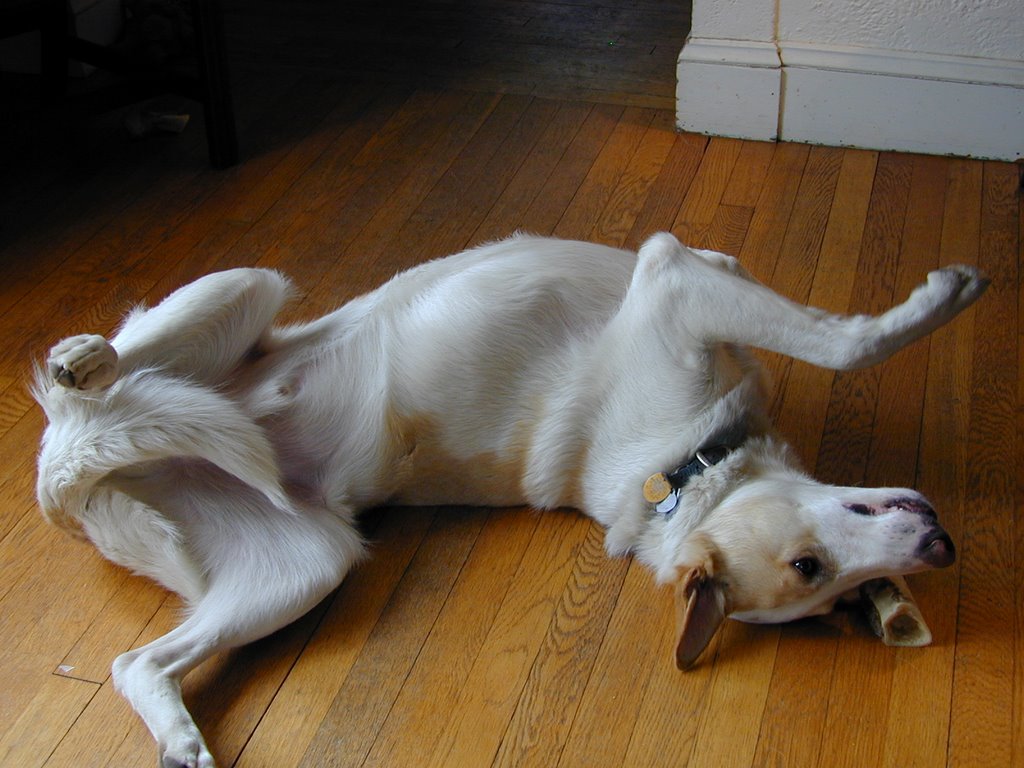
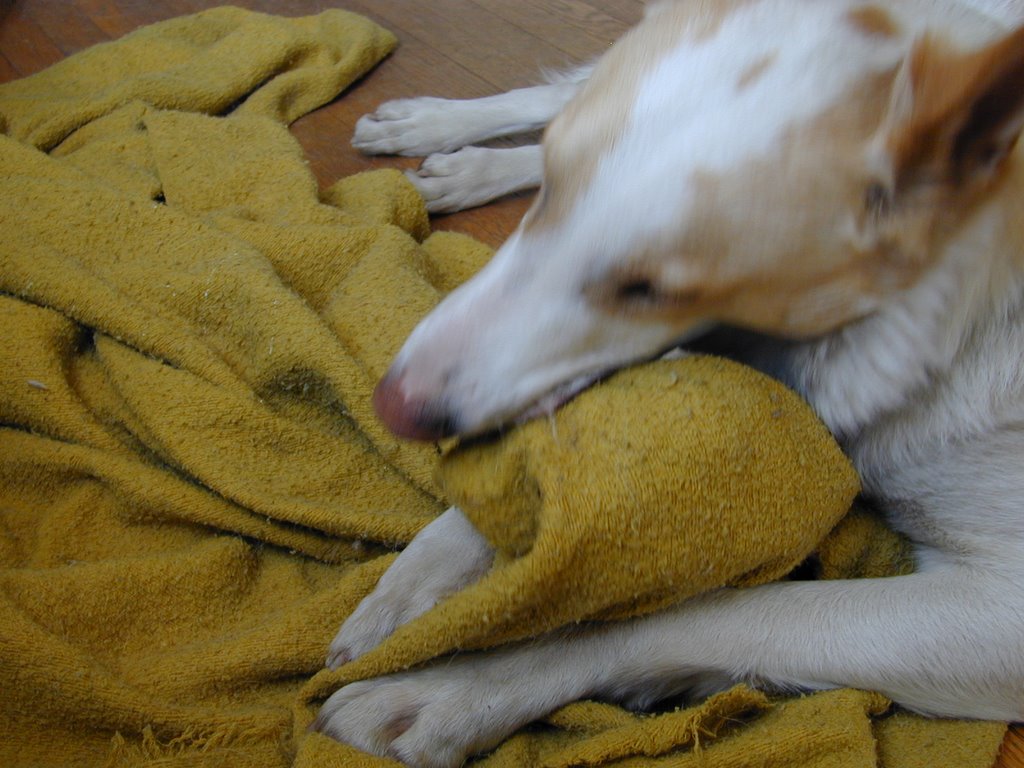
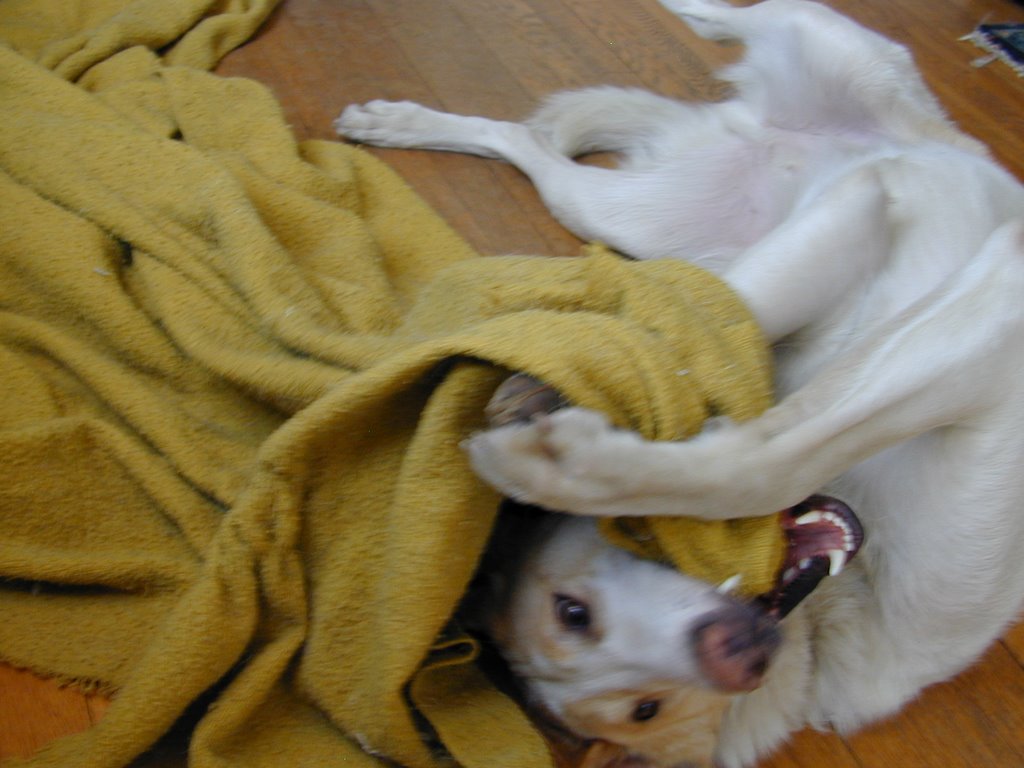
This morning, I decided to get out my camera to see if I could capture him manipulating things with his dewclaws. I figured it would be easy. I gave him one of his old bones. Right away I could see him using his thumbs. The only problem was that it was not easy to show the action of manipulating with a still camera. The long shutter speed required when the flash is off makes it even more difficult. If I keep the flash on, I start to conditioning my dogs to leave the room when I pick up the camera. I could have gone outside for better light, but I was just too much of a wimp to sit out in the cold mud today. OK. so now that I have given all sorts of excuses for the bad photography, let me continue on about Kahlil and his dewclaws. I gave him the old bone and he started to chew it on the rug where he wisely knew there was good traction. I told him he had to chew it on the wood floor because I thought that the pattern of the rug was too busy for a good photo. He complied. The bone was slipping around on the wood floor, so he picked it up and put it on one of the dog blankets that litter the place for better traction. Although the photos donÂ’t actually show the use of his dewclaw, I can attest that he used his dew claws both like thumbs in grasping and also in pushing. It is probably very easy to observe this in your own dog if it still has dewclaws. The bone was still not stable on the blanket. He then did something that I though was interesting, considering that I was watching and taking the pictures to document manipulation. He pushed the bone under the blanket with his nose. I can not say for sure if this was intentional . He then wrapped the blanket around the bone to stabilize it. Although the following photos are blurry, I think they show what I am describing. I do know that he easily could have removed the bone from the blanket if he had wanted to, but he did not. It seemed that eating the bone wrapped in the blanket was a very interesting form of manipulating of objects that I had not even started out to document. Dogs can be so interesting sometimes, especially when I supposed to be doing something else like bill paying or laundry.

Cocoa my other dog has an interesting type of blanket manipulation herself. She can totally wrap herself up in a blanket tha is in a heap on the floor. It is a hoot to watch. Guests love it. I have to think of a way to show it without a video camera. My sister-in-law once had a pointer who rang the back door bell to be let in and I had a pointer who learned how to open a difficult gate latch and let himself out of the yard.

What other kinds of interesting manipulation of objects have you observed in your dogs? Does your dog have dewclaws? Has you dog ever injured a dewclaw? What do you think of dewclaw removal? Please comment. I love this kind of stuff.
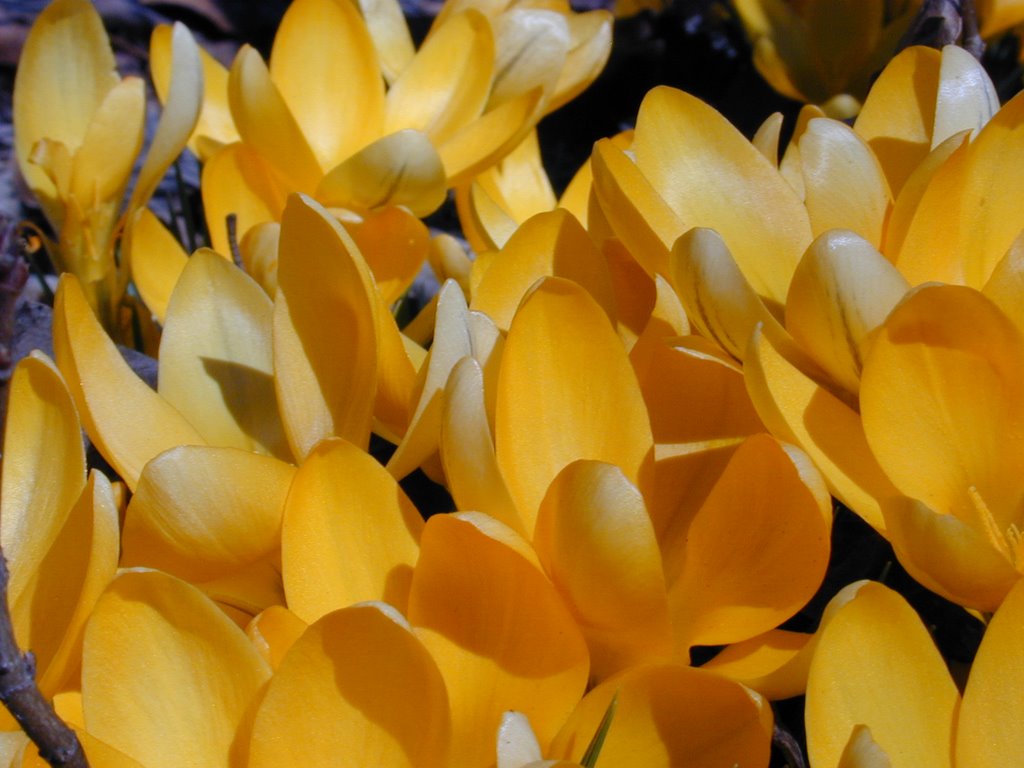
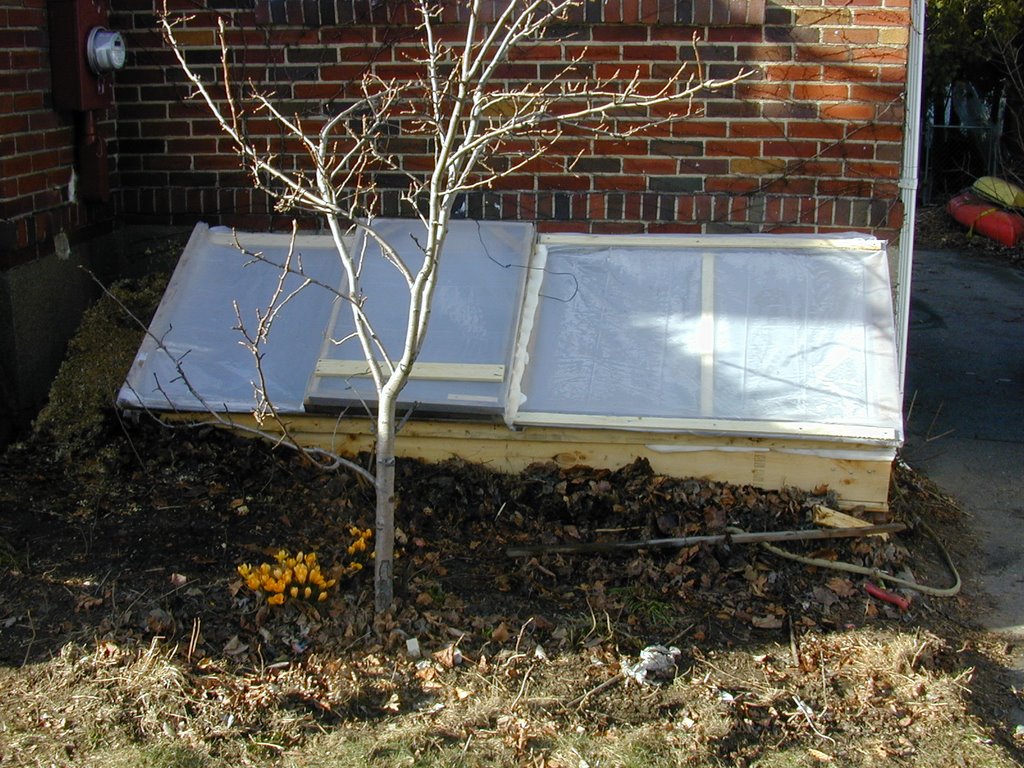
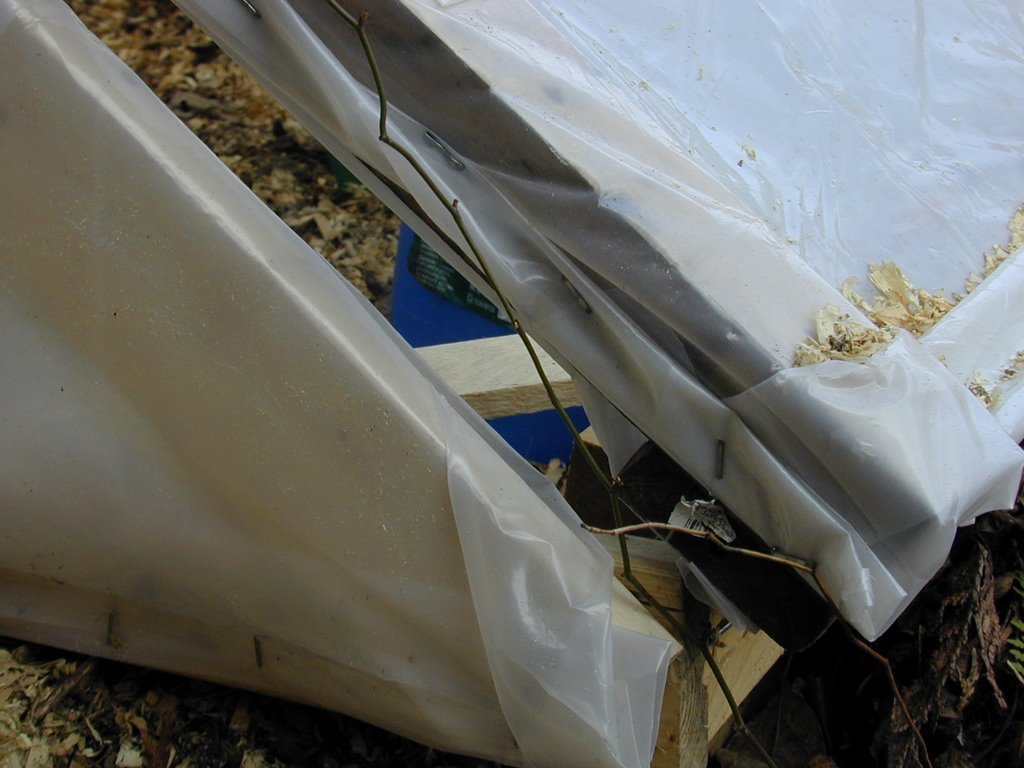
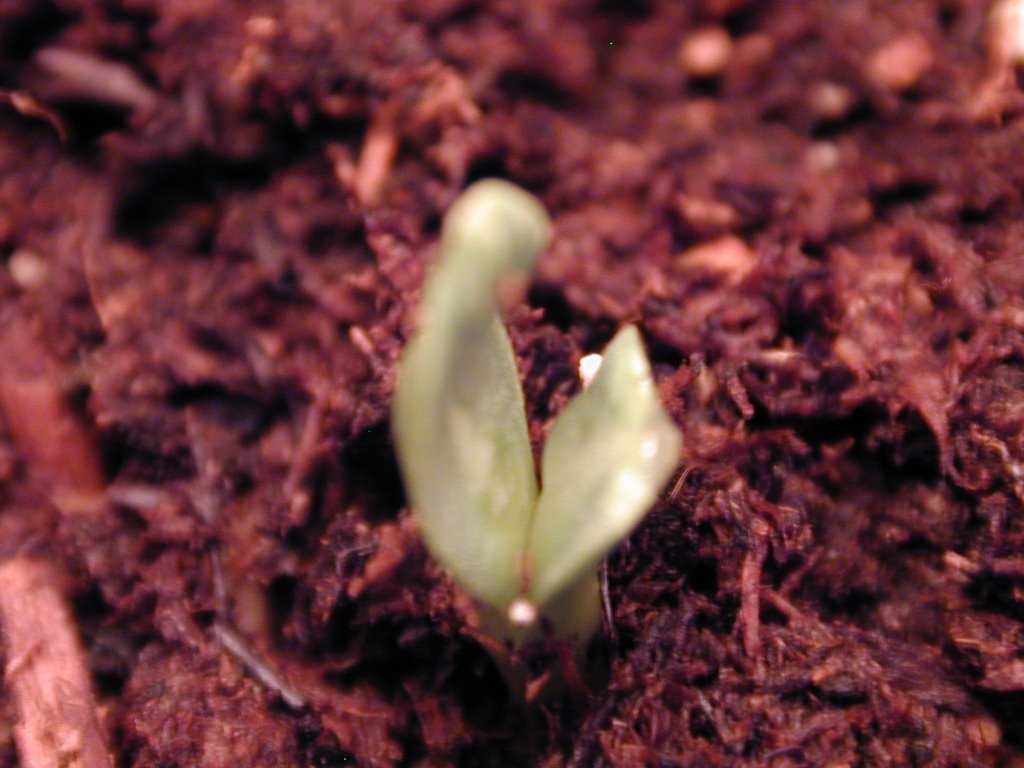
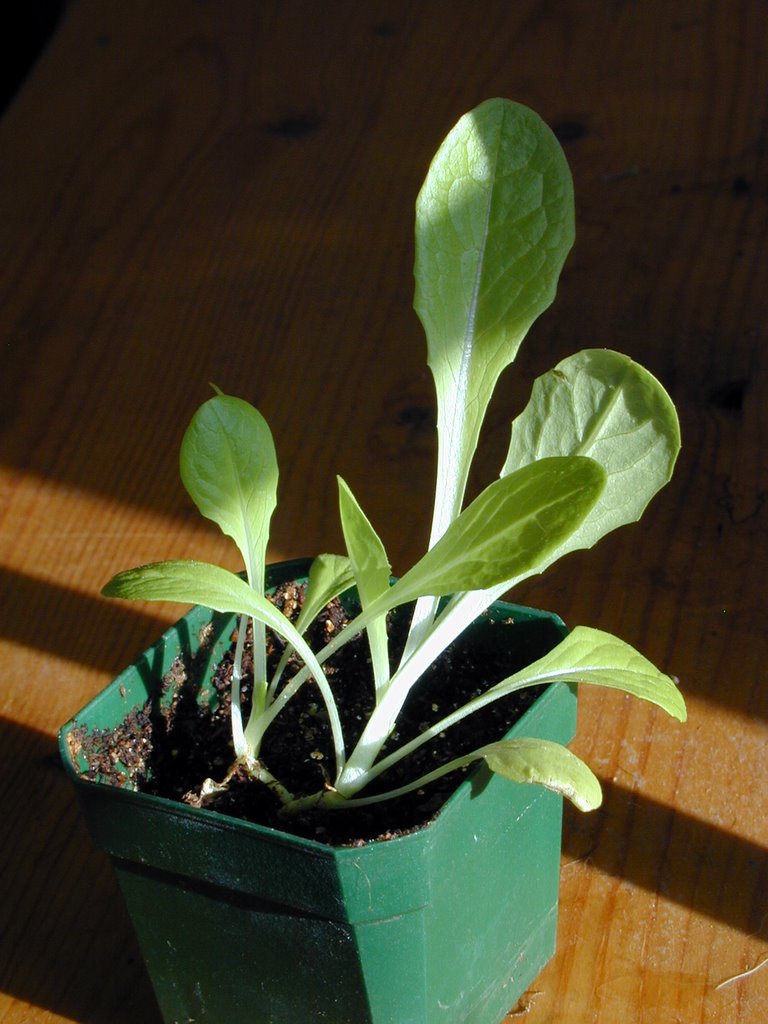
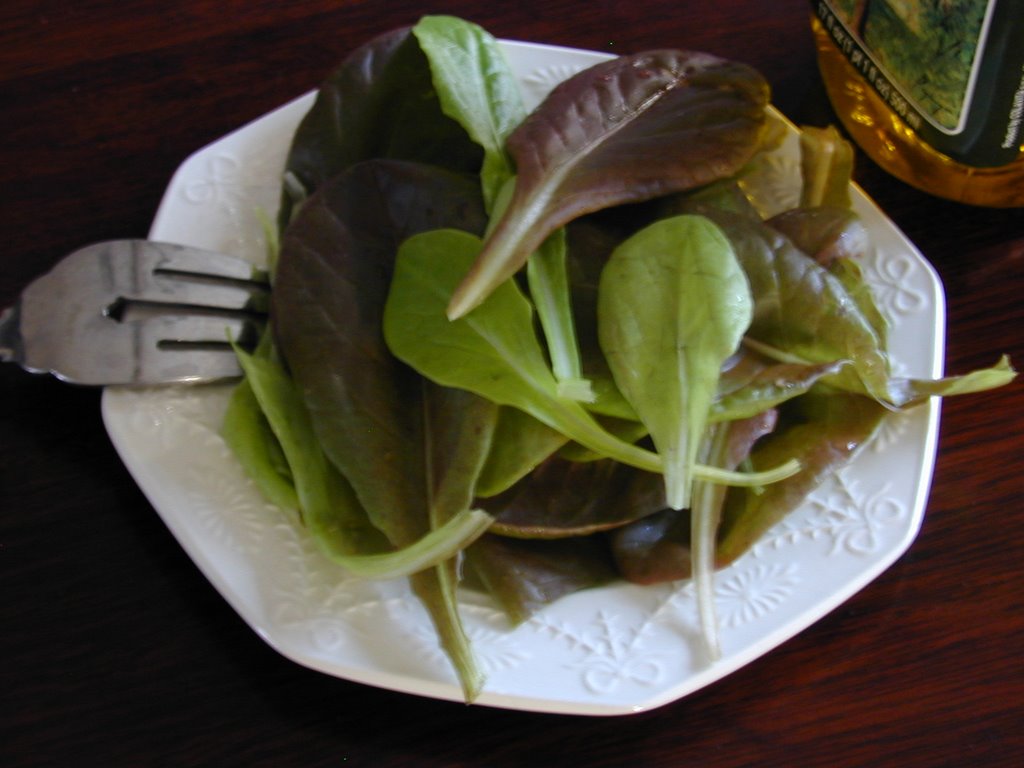
Saturday, March 18, 2006

Cold-frame - Done But...

Well, the cold frame is completed and out in the garden. I was worried that with my lack of carpentry skills and the fact that all the angles were not 90 degrees that there might be some problems. There are, but I’m hopeful that they can be fixed. If you want some history on this project you can look HERE and HERE. Below is a photo of it in place. The base is 8 by 3 feet. The front of it faces SSE. You can see the frame of 2x6s I built for it to sit on. The land slopes slightly from west to east here. On the right side, I had to build up things with bricks. Over the last few weeks I’ve been filling up the right side of the frame with old leaves and chicken litter made of manure and pine shavings to even things out. Normally I wouldn’t waste the chicken litter as fill, but I figure as water leaches through it, the little pear tree will benefit.
Each side lifts up. You can see a little gap that needs to be filled between the two doors. I have some old felt weatherproofing strips that I think will suffice to plug the gap. In the photo below, I've opened the left side door to show the automatic vent that will open the right side of that left door. I hope this makes sense. I haven't had a chance to see if the vent will work because the maximum temperature that was reached in the cold frame today was 76F , not high enough to trigger it.
Considering that the maximum outdoor temperature was in the 30s and the serious problem pictured below. I was happy with 76F.
Looking at this photo, you can see that somehow I didn't build the sloping side on the left high enough. Oops! I'll need to fix that before putting plants out because lows for the next few days are expected to go to 20F. With a leek that big, it will never retain much heat at night. It's a gap of about an inch! There are some more details that I want to mention about the cold frame, but this post is long enough so I'll save them and some more photos for tomorrow.

Friday, March 17, 2006

With Luck

OK this time I mean it. If luck goes my way today , then tomorrow I will post pictures of the new cold frame mentioned HERE and HERE. Today a friend is coming by to help me carry out the thing and I promise a photo even if we drop it and its a crumbled mess.

The above photo is another one that I took when I VISITED the Wellesley College greenhouses. I saved it for St. Patricks Day which is rather a big holiday here in Boston.

Tuesday, March 14, 2006

Clabber and Bonnyclabber

I like eating clabber. I like making clabber. I even like sound of the word clabber. It’s a word that’s kind of archaic and rather obscure. I’m always waiting for it to come up in a crossword puzzle. It hasn’t yet. The American Heritage Dictionary on my shelf defines clabber as follows; clabber n. sour, curdled milk. –tr. & intr.v. –bered, -bering, -bers. To curdle.[Short for obs. bonnyclabber < Gael. bainne clabair : bainne + clabar, thick sour milk.]
Many of us are more familiar with a Turkish word for a type of clabber. It’s called yogurt. It’s the type clabber I made yesterday and had for breakfast this morning with some fruit. It’s not the only type of clabber, but it’s the only one I’ve ever made. Different bacteria make different types of clabbers.
On a yogurt container you might read that it’s “a cultured milk product”. I like the word clabber better. It’s less scientific, more agrarian, but I suppose it would really confuse people to pick up a container of yogurt and read “XYZ yogurt, a clabber”. If I owned a yogurt company I’d call my yogurt Bonnyclabber Yogurt. Even though it’s redundant it sounds cheerful.
The word clabber definitely sounds so much better than curdled milk and is actually more concise. Curdled milk reminds me of what happens to pasteurized milk that’s kept far too long and actually starts to putrify. It’s a nasty smelly thing. I’ve also heard of another word for clabber. It’s probiotic, a new fangled word for old-fangled clabber

Whether you want to call it clabber, bonnyclabber, yogurt, a probiotic or a cultured milk product, it’s very easy to make. All you have to add to some milk is heat and certain bacteria. The most commonly used for yogurt is lactobacillus acidophilus. Clabber is also much easier to digest than milk. The bacteria have started to break down the lactose. Most of us can not digest lactose as well as we could as infants so it’s nice that those little bacteria are doing it for us.

There are special yogurt makers available, but they are for convenience, not necessity. The way I made my clabber was to 1. Heat milk to 180F for a few seconds to kill off other bacteria in it. 2. Cool milk to about 115F. 3. Add a large spoonful of plain yogurt whose container says it has active cultures. Keep it warm at about 100 – 115F. After some hours it will set, and voila it’s bonnyclabber. I kept it warm using an electric skillet rigged as a double boiler. The skillet lets me keep the temperature just right. There are many other methods that might work better for you.

Sunday, March 12, 2006

Artichokes

A friend and I are taking on the challenge of trying to raise artichokes this summer. It's a challenge because we live in Massachusetts. In a warmer climate they are a perennial and produce buds the second year. Our climate is too cold for them to winter over so we have to trick them into thinking that two seasons go by in one season. They need a period of vernalization where they have a certain number of hours of cold temperatures. We discovered we can vernalize the seeds in the refrigerator or naturally vernalize the plants outside in cool temperatures. We started with a package of 25 seeds. I took 10 and planted 8. My friend divided the rest into two groups. One group she planted and one group of seeds is vernalizing in the refrigerator. Natural vernalization is supposed to produce more buds, but vernalizing in the refrigerator is more controlled. When vernalizing outside, its possible to not have enough cool temperatures or to freeze the plants or to break vernalization if it gets too hot. Friday two of my seeds started to sprout. Today I decided to document the event. Below you can see one of the tiny sprouts. You can even see the strand of a web that I couldn't see until I looked at the closeup photo.

After the photo shoot I went to move the cell pack back to its place and managed to drop it. I suppose I should be happy that I only lost 1/2 of one of the two seed leaves. It could have been worse. I really think sometimes it's possible to pay too much attention a plant, too much fussing, photographing, and moving. I think I'd better go plant those 2 backup seeds I was saving, and I will be reporting back soon on whether a seedling can remain viable after a partial amputation.


Tuesday, March 07, 2006

Moving to Bigger Digs

I'm not the one moving. It's some of my tomato seedlings that are being transplanted. I planted them in a nine cell tray and I decided it was time to transplant them to four cell trays where they will stay until it's time to transplant them to the garden. Around here Memorial Day is when we set out peppers and tomatoes, so they have quite a bit of time to wait.
I'd planted 2 seeds in each cell and in many of the cells both had sprouted. Because they were still so small, I was able to transplant each little seedling. When I was finished I had 16 seedlings. This is only one of the varieties of tomatoes I planted. If all my varieties of tomatoes make it I'll have too many for my garden and will probably give the extras away. It's fun to give seedlings to friends and then see how they do in their garden. It doesn't just generate good will. Often the different results for the same variety of plant will point out the pros and cons of different soils or care or conditions also. I also decided to try an little experiment on these seedlings. The sample size is way too small for the results to be any where near statistically valid, but I think it will be fun. I have two kinds of fertilizer, an organic fish fertilizer 2-4-1, and fertilizer called organic Plant-tone 5-3-3. I am also making some chicken manure tea (yum yum). Each tray of four will get one type of fertilizer and there will be a tray that receives nothing. I'm not sure of the feeding schedule yet, but I'll let you know what happens with photos of course.

Monday, March 06, 2006

Coldframe 2 - a slight problem

Yesterday I made some progress on the coldframe. As I mentioned in my last POST, I decided to have two hinged windows because I was afraid that the automatic opener might have trouble with the weight of one big window. Below is the first window with its "glazing". The glazing is not glass, but is 4mil plastic. I cut one big piece big enough to wrap both sides. I'm hoping that the air space between the two layers of plastic might help with insulation. One dilemma I had was how to attach the plastic to the wood. I was afraid that if I just stapled or tacked it on that the holes I created might be a weak point that would continue to tear bigger holes in the plastic later in when it was windy. I thought that it might work better with something like rubber washers and screws. That way the washer would be between the screw and the plastic. I still think that might be a good idea, but I didn't have any rubber washers on hand and I did have some pieces of lathe so I used the lathe.
Below you can see how the plastic sheeting is fastened with the strip of lathe.

With the help of one of my kids who happened to come visit just exactly at the point that I needed a second pair of hands, I screwed on two hinges and attached the 1st door. It seem to fit reasonably tightly to the top part of the frame shown here.


I got out the automatic opener and studied it and realized I had a problem. It's for a vent not a door! Once I attach it, it will open the door enough to vent the coldframe. However, I won't be able to open the door further to tend to the plants. Oops! My latest idea, now, unless someone gives me a better idea is to build a window within a window on the second window. The inner window will be the one that the vent opens and the outer window will be the one I can open to get inside. Sadly this will be more work and more wood to scrounge up. The packing crate that the new furnace came in had some good pieces of wood that I used. I'll have to see what else is there before it gets hauled away soon. Despite that it's taking a long time, I'm having great fun building this and am anxious to get it finished and set in place. I also can't wait to try my new min/max remote THERMOMETER in my coldframe or as I like to call it my solar home for seedings.

Saturday, March 04, 2006

Coldframe Update 1

I've finally started to build the cold frame that I plan to use this year. If it were what I think of as a standard coldframe, it would be finished by now because it would be easy. I would have just made a rectangular frame from, 2x6 or 1x6 boards. I'd then place an old window on top of it and that would be it. My new coldframe is going to be a lean-to style with an automatic window opener and any carpentry project that has angles other then 90 degrees and no plans to follow confuses me. This probably is because I'm too old to have taken wood shop class in school. When I was in school, girls took cooking and sewing and boys took metal and wood shop. Fortunately it was different for my kids.

My system is, think a little, build a little think a little, build a little... and then brace it if it's too wobbly. I usually don't know enough to envision the whole thing at once. I welcome any advice anyone has to offer. This POST shows where the cold frame will go. It is going to be a lean-to against the house so that I can crack open that cellar window you see if the temperature dips down too cold some nights. The cellar room that it opens into only has an oil tank and a freezer so if it gets a little chilly in there some nights, it won't be a problem. The oil tank might actually be a good heat store. Here's the frame. The right side will go up against the house. On the sloping left side there will be two tilted windows side by side. I decided on two because I was concerned that the automatic opener would not be able to open one large window. The whole thing you see will sit on a rectangular frame of 2x6s.

In this next picture, leaning up against the oil tank is the first of the two window frames. Above the oil tank is the same window that you see in the outside view of the coldframe location in the link above.

The next task will be to 'glaze' the windows. The glazing material will be 4 mil plastic. I plan on having 2 layers one on each side of the frame. I've started this and will show an update tomorrow. It seems like nailing or stapling the plastic directly to the wood might cause it to tear easily. I'm experimenting with a few solutions to this, but would really welcome any advice anyone has on any of this. Please!

Cabin Fever Cure

It's been cold and VERY windy here lately. Yesterday as an antidote to this, a friend and I visited the Wellesley College greenhouses in Wellesley Massachusetts USA. It's free and open to the public and I recommend it to anyone who needs a little tropical break from winter or who just likes looking at lots of plants from all over the world.


Thursday, March 02, 2006

Lettuce Seedling

When I started my seeds, I started a few individual small pots of Romaine lettuce. They've grown faster than my other lettuce seedlings and they are ready for transplanting outside. The only problem is that I haven't finished building my coldframe and it's too cold for them to go directly into the garden. So I went to get more lumber and spent part of the afternoon working on the coldframe. It's coming along. It's still even early for a plants to go into a coldframe here, but I want to get it set up soon so I can start monitoring the temperature in it.
The amaryllis bud from two days ago is opening a little more and a second bud on another plant is coming along.
While I was buying the lumber I got some more seed starting mix, so I think I'll plant another tray of tomatoes and sweet peppers. There is no such thing as too many tomato plants in my opinion.