Well, the cold frame is completed and out in the garden. I was worried that with my lack of carpentry skills and the fact that all the angles were not 90 degrees that there might be some problems. There are, but I’m hopeful that they can be fixed. If you want some history on this project you can look
HERE and
HERE. Below is a photo of it in place. The base is 8 by 3 feet. The front of it faces SSE. You can see the frame of 2x6s I built for it to sit on. The land slopes slightly from west to east here. On the right side, I had to build up things with bricks. Over the last few weeks I’ve been filling up the right side of the frame with old leaves and chicken litter made of manure and pine shavings to even things out. Normally I wouldn’t waste the chicken litter as fill, but I figure as water leaches through it, the little pear tree will benefit.
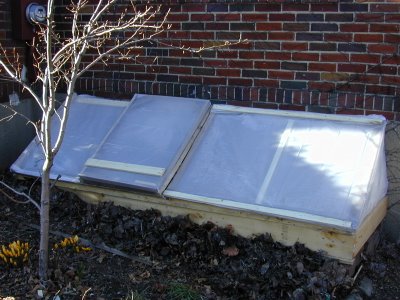
Each side lifts up. You can see a little gap that needs to be filled between the two doors. I have some old felt weatherproofing strips that I think will suffice to plug the gap. In the photo below, I've opened the left side door to show the automatic vent that will open the right side of that left door. I hope this makes sense. I haven't had a chance to see if the vent will work because the maximum temperature that was reached in the cold frame today was 76F , not high enough to trigger it.

Considering that the maximum outdoor temperature was in the 30s and the serious problem pictured below. I was happy with 76F.
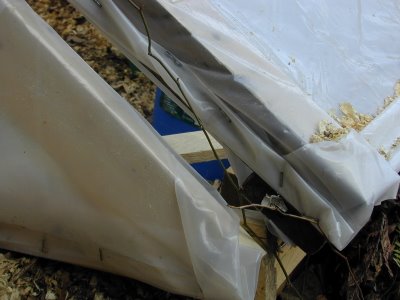
Looking at this photo, you can see that somehow I didn't build the sloping side on the left high enough. Oops! I'll need to fix that before putting plants out because lows for the next few days are expected to go to 20F. With a leek that big, it will never retain much heat at night. It's a gap of about an inch! There are some more details that I want to mention about the cold frame, but this post is long enough so I'll save them and some more photos for tomorrow.
 Each side lifts up. You can see a little gap that needs to be filled between the two doors. I have some old felt weatherproofing strips that I think will suffice to plug the gap. In the photo below, I've opened the left side door to show the automatic vent that will open the right side of that left door. I hope this makes sense. I haven't had a chance to see if the vent will work because the maximum temperature that was reached in the cold frame today was 76F , not high enough to trigger it.
 Considering that the maximum outdoor temperature was in the 30s and the serious problem pictured below. I was happy with 76F.
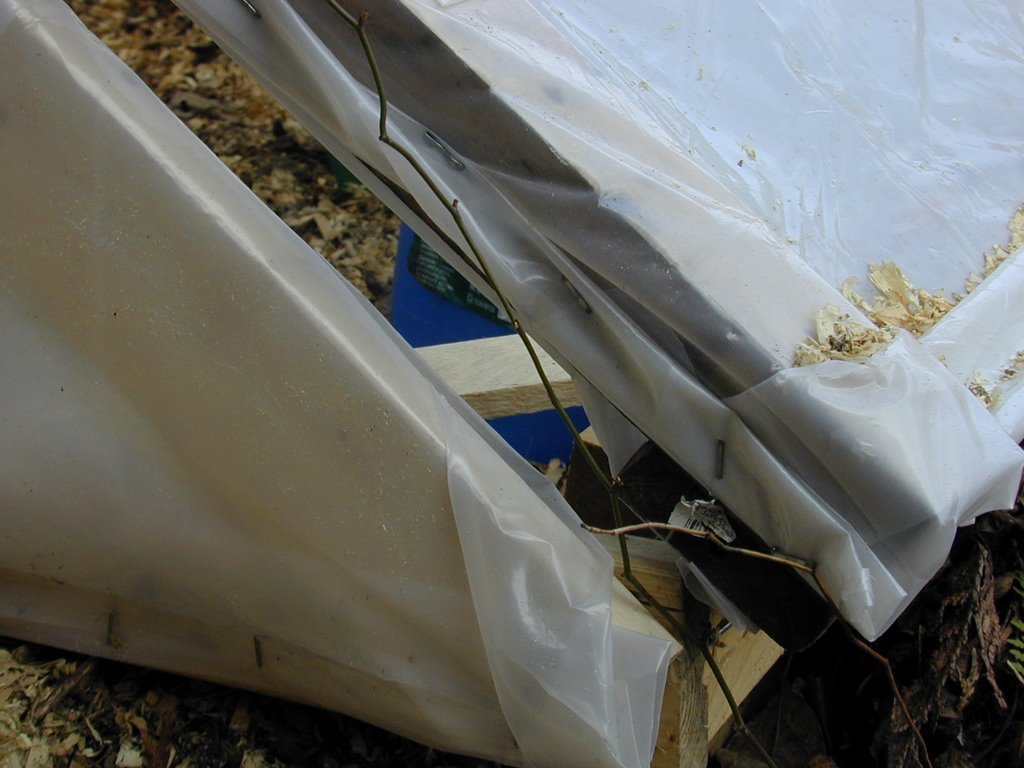 Looking at this photo, you can see that somehow I didn't build the sloping side on the left high enough. Oops! I'll need to fix that before putting plants out because lows for the next few days are expected to go to 20F. With a leek that big, it will never retain much heat at night. It's a gap of about an inch! There are some more details that I want to mention about the cold frame, but this post is long enough so I'll save them and some more photos for tomorrow.
No comments:
Post a Comment