 Nicholas, one day old
 Nicholas, home with Mom by the Christmas treeNicholas, one day oldNicholas, home with Mom by the Christmas tree
 Three weeks later 6 of them hatched, including the cracked one. Below you can see a chick emerging from an egg. This is actually the egg that was cracked. I really didn't think it would make it, because early on it appeared that the egg leaked a very tiny bit. I can only assume that the leak got plugged very soon and things progressed. I had heard of repairing cracked eggs with wax or clear nail polish, but I decided to just let it be and see what happened.
 Below you can see the 6 chicks that hatched. The yellow one in the back corner is the one from the cracked egg. The other egg that I wondered about was the very small egg. It did hatch a small chick. I think it may be a bantam and is kind of cute with feathered legs.
 Below is a close-up of the cracked egg after I took it out to candle. It was then that I discovered that it was developing so back in it went. After the hatch was over,I checked the two eggs that didn't hatch. One was not fertile and one had stopped developing after about 8 days. I'm quite happy with the new incubator and look forward to hatching more in the spring.
 It's a damp raw slushy day out, just right to stay home and bake for Thanksgiving
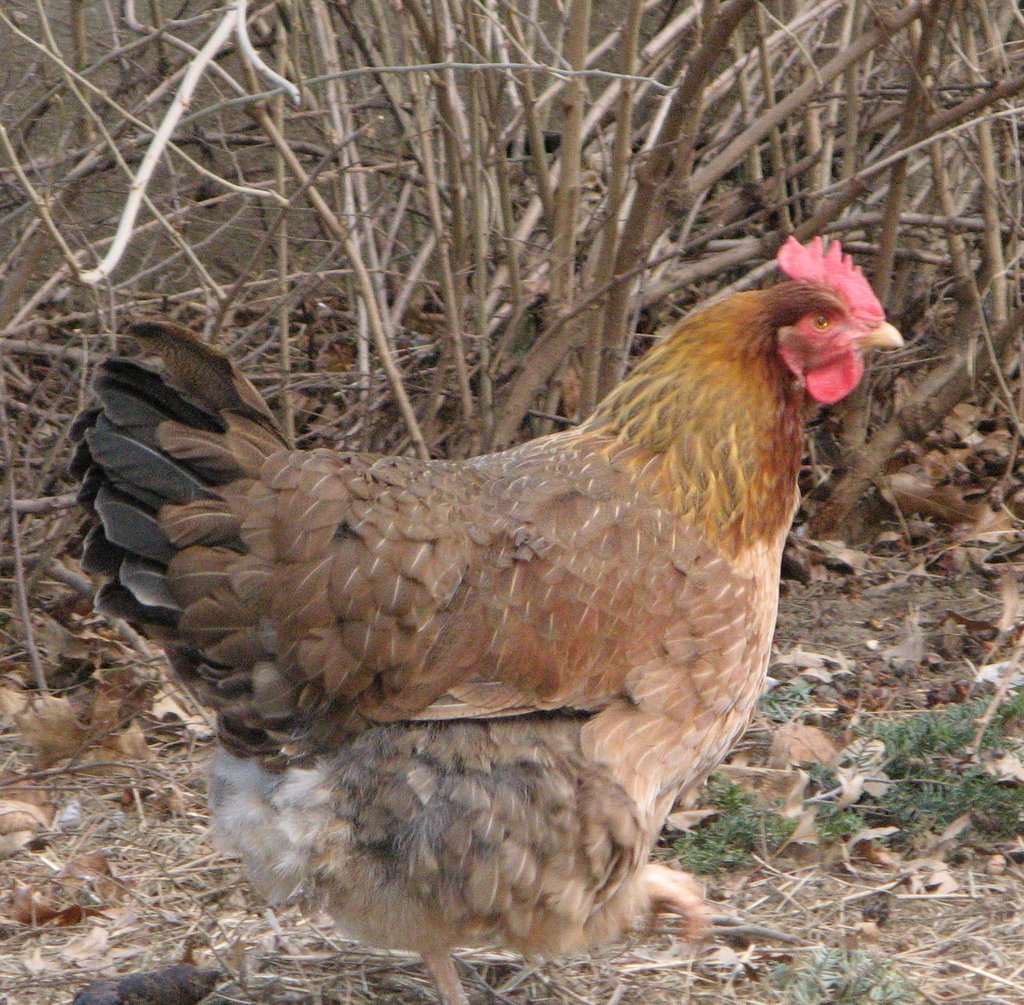
 The type of chickens that lay blue eggs are called Easter Eggers. They are Araucana mixes and can lay blue, green, brown or white or a blend of those colors depending on the genetics. The gene for blue eggs is actually dominant. It is a seperate gene from the ones that control white or brown egg color. So the egg can have both blue and brown color. That can make them look greenish or kakhi.

 click on photo to enlarge
 This year I decided to try raising something a little different in my community garden plot, Cornish Cross broiler chickens. I've raised these before but not in my community garden plot. I got permission to do this and am calling it a pilot project. Hopefully next year other gardeners will join in also.

 Although the dahlia leaves were black, the flowers haven't turned to mush yet.
 What if you have a few chicks that are are ready to go outside and you haven't had time to build that chicken mansion you've been designing? If you have an old plastic dog crate you are in luck. Get some welded wire, a wire cutter and a pair of pliers and create a quick and dirty version of the fancy igloo type chicken coop. I did this one in 45 minutes. The door is on the end away from the dog crate. Make the door large enough so the sides can fold around the pen for a little extra security and make sure the cage part if high enough for the dog crate to open and close.
" hinge"

"latch"

 A microclimate is a local area where the climate differs from the surrounding area. This area on the south south east side of my eastern Massachusetts house forms a small microclimate. Due to the exposure, the cement foundation, the bricks of the house and it's proximity to a heated home as well as a westerly wind block it is much warmer than the rest of my yard. The daffodils just 20 feet away only have leaves 4 inches tall and have no buds yet.
  It always amazes me how quickly baby chicks grow and feather out. At 13 days old, they seem to have tripled in size and are sprouting wing and tail feathers. They also easily fly up onto a low perch.
 An Easter Egger chick hams it up for the camera while her fellow Buff Orpingtons and Sliver Laced Wyandottes eat dinner.
 Baby chicks - araucanas, buff orpingtons, gold laces wyandottes, and barred rocks
 Araucana chick
 I enjoy taking pictures of flowers but about the only thing that blooms now are my indoor amaryillis bulbs that I save from year to year. The red one is the last one that will bloom for the season. The pink one was impressive and is even interesting (to me) in its decay. Now I'll need to wait for the crocus and daffodil bulbs which were poking up, but are under snow once again. Last year I couldn't wait and needed to visit Wellesley College greenhouses.

We are now in the season of mud
Lace your boots tightly or the mud will suck them right off your feet.
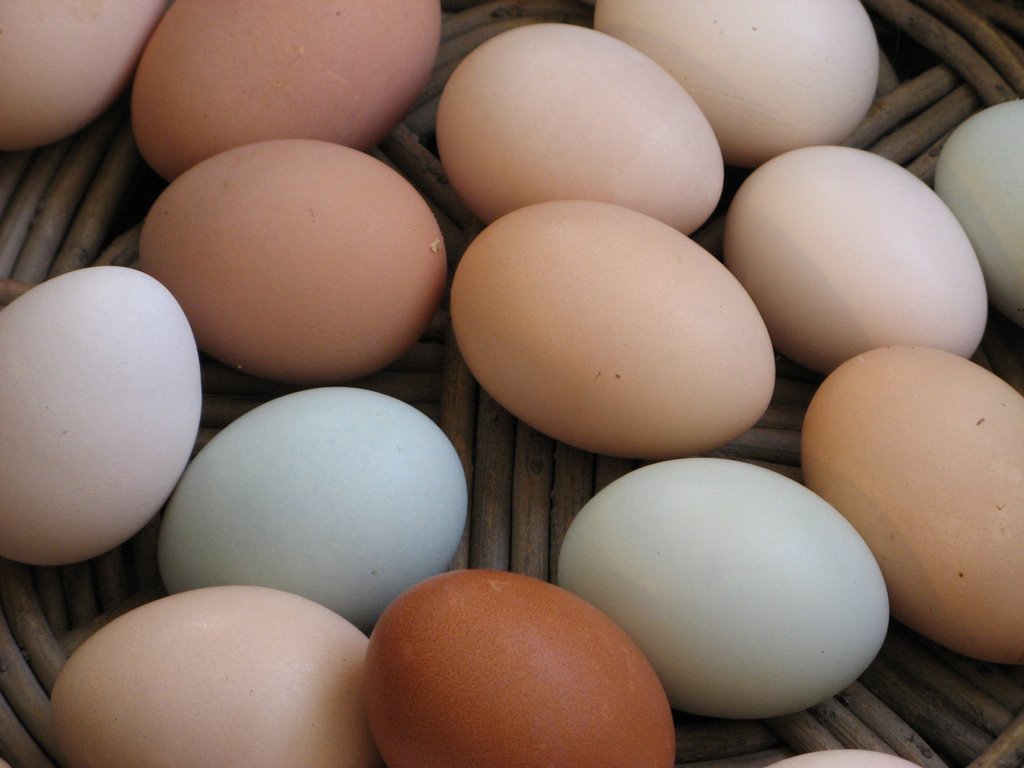 Some of the eggs recently produced by the chickens at Codman Farm
Today I just want to let people in the Boston area know that Codman Community Farm in Lincoln Massachusetts will be running a class this spring on raising backyard chickens. This will be a great opportunity for people who want to raise their own chickens or just find out what's involved. I've included a description of the class here. Probably most people will be interested in raising laying hens, but it will also include raising broilers.
Please pass the info on to anyone who may be interested.
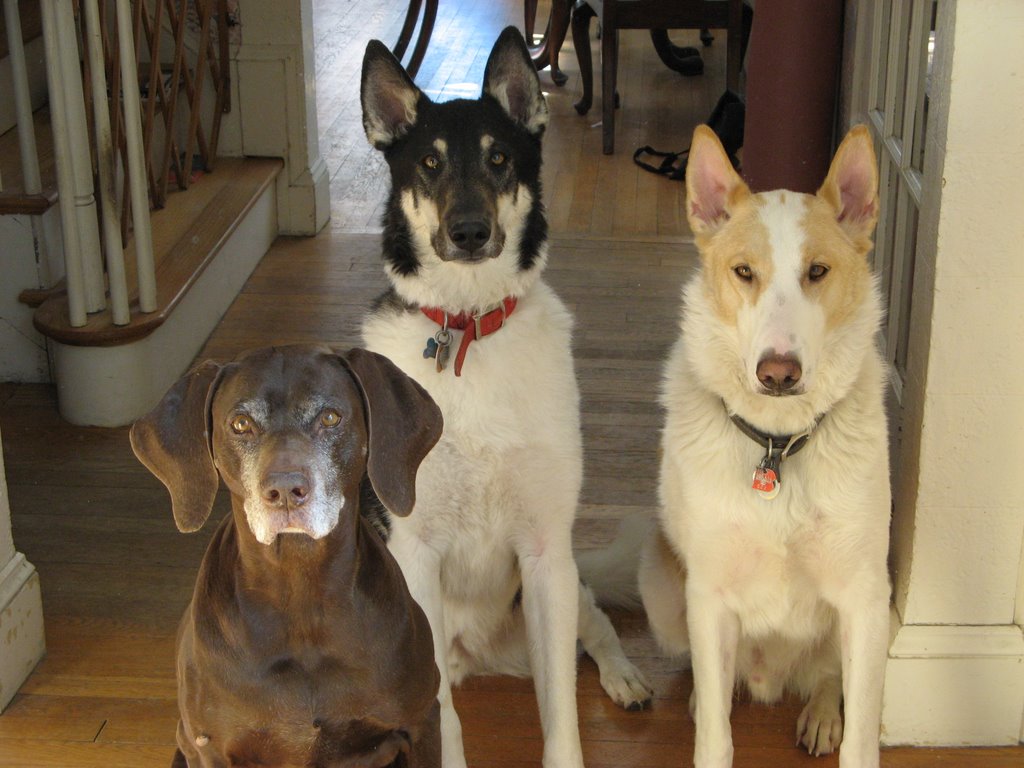 Here you see, from left to right Cocoa, Bogie and Kahlil. Cocoa and Kahlil are my dogs and Bogie in the middle is my daughter and son-in-law's dog who was visiting for the day. I thought I'd practice sit-stay with three at a time. It actually went better than I thought it would.

 I'm now toying with the idea of adding a third door. This would be a chicken size door so that the chickens could come and go during the day, but the large egg thief shown below couldn't get inside. Better dog training would be an alternative to the door and I'm considering it also. I've been kind of letting the egg stealing slide because he's been pretty good with the chickens lately. He wasn't always and there have been past problems chasing chickens. When a dog chases chickens, the chickens panic and flap a lot and that seems to elicit even more prey instinct in the dog. It becomes a bad and vicious circle with potentially fatal results for the chickens. The other day, watching from the window, I saw him mostly inside this new coop with chickens still inside it. I held my breath. Eighty pounds of dog and panicking chickens inside a coop this small would be ugly. He slowly backed out with an egg in his mouth. I exhaled. I guess it's better eating eggs rather than chickens, but eating neither would be best.
With the old raised coop, he only ate eggs that I put aside and forgot. I didn't realize that making the new coop low would give him access to the eggs and that I'd create yet another dog training opportunity for myself.
Kahlil eating an egg he just stole from the nest box. He doesn't seem to be bothered by the feather that came with it that's tickling his nose

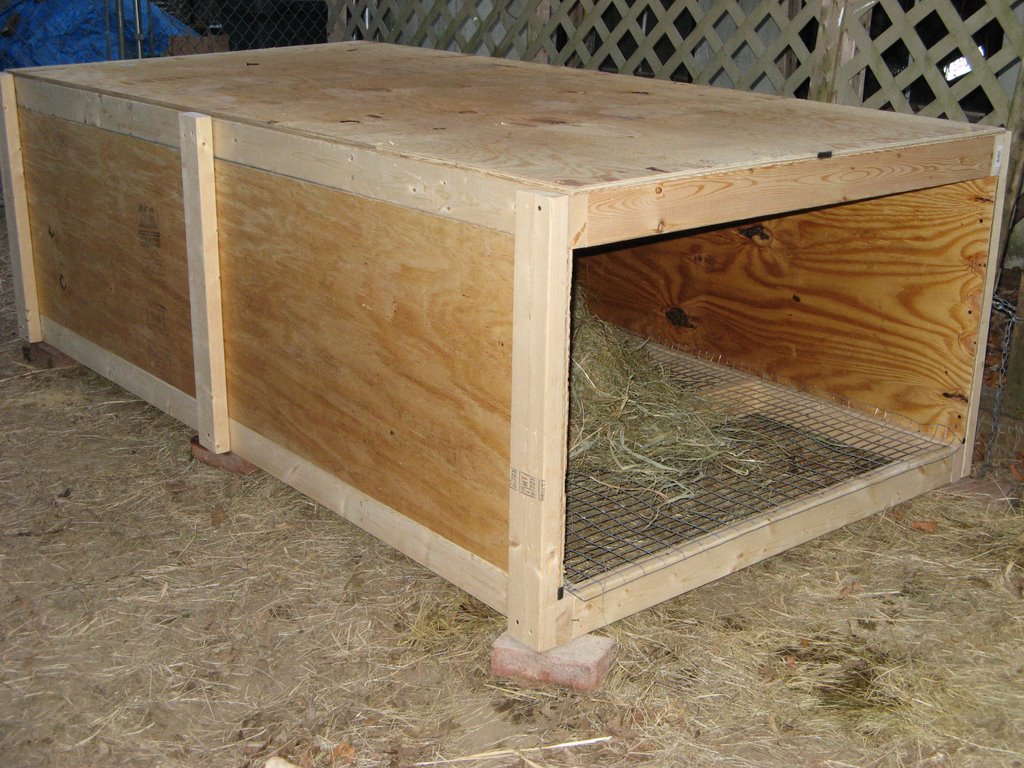
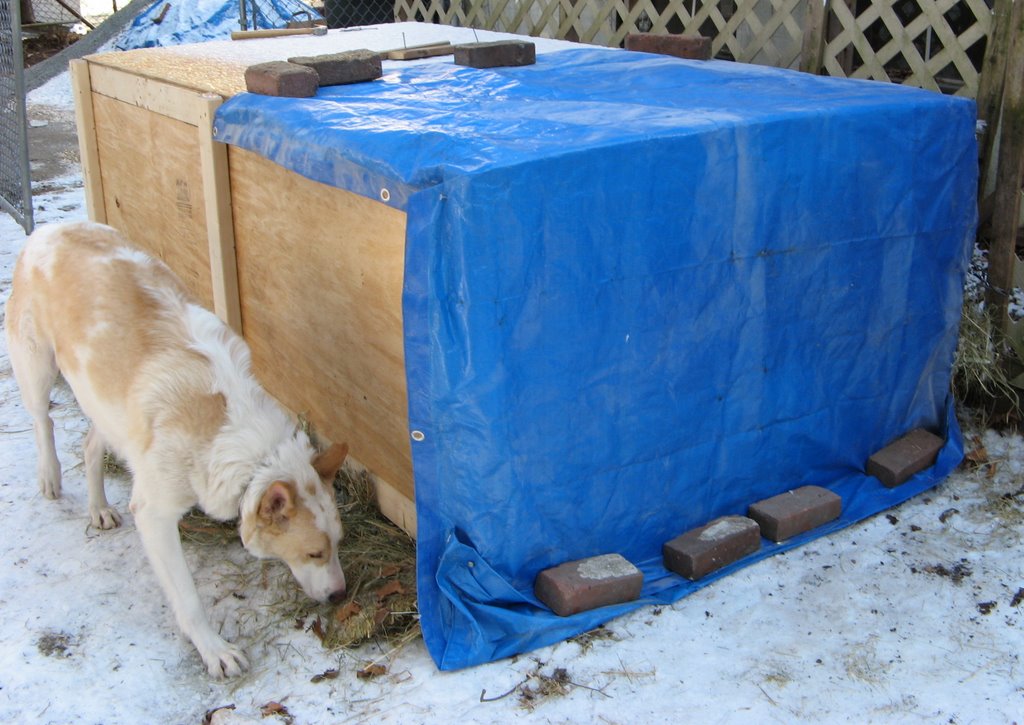 I screwed the front door on and added a 2x4 inside to roost on and then threw in some hay over the wire floor. I figured the chickens were not used to walking on wire and the hay would be less of a change for them at first. Tonight will be 8F. with 20-30 mile an hour winds. I figured the hay would help keep lessen any draft so I also added some to cover the opening at the bottom between the tractor and ground.
The front door is covered in plexiglass that I got from an old storm door, and a small piece from another project. An area about 8x10 inches is left open in the upper left corner for ventilation.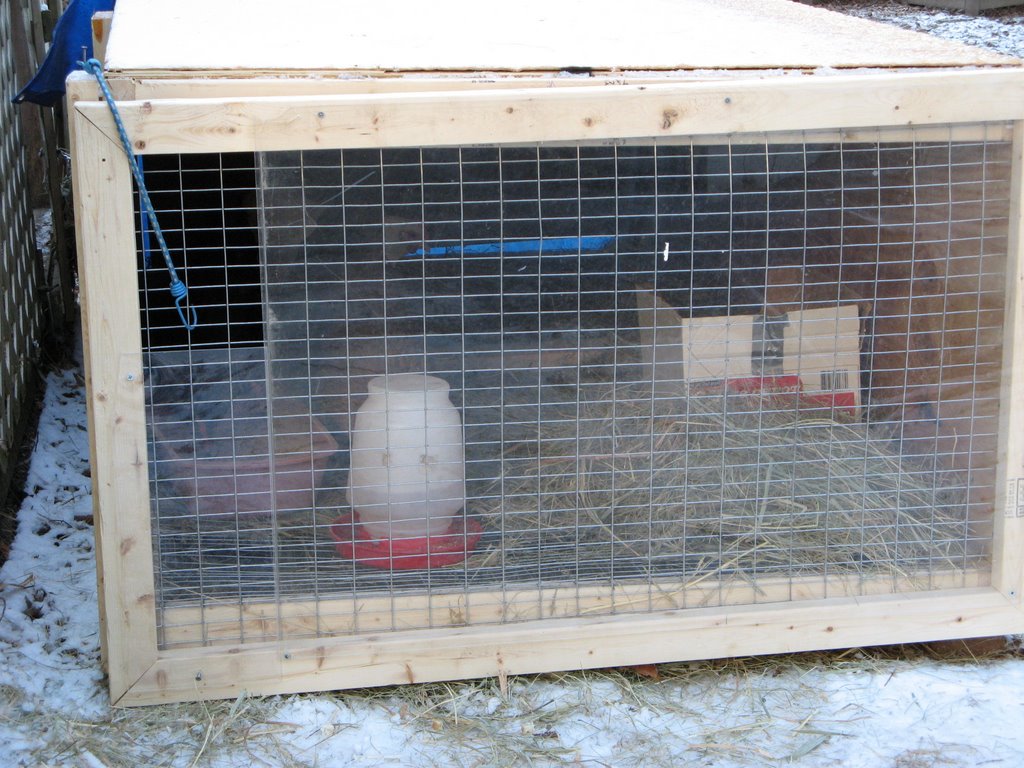
Here is a view looking in from the front. The chickens are used to roosting higher so having a roost that is only 2 inches high, for now, will be an adjustment.
 The next step will be to get some wheels onto this thing to make it mobile.
Update: I just went out with a flashlight to check on the chickens. They are in the front right corner and one is in the nest box. I guess they don't consider a roost that's 2 inches high a 'real' roost, or they are smart because I think they picked the most sheltered area in which to bed down.
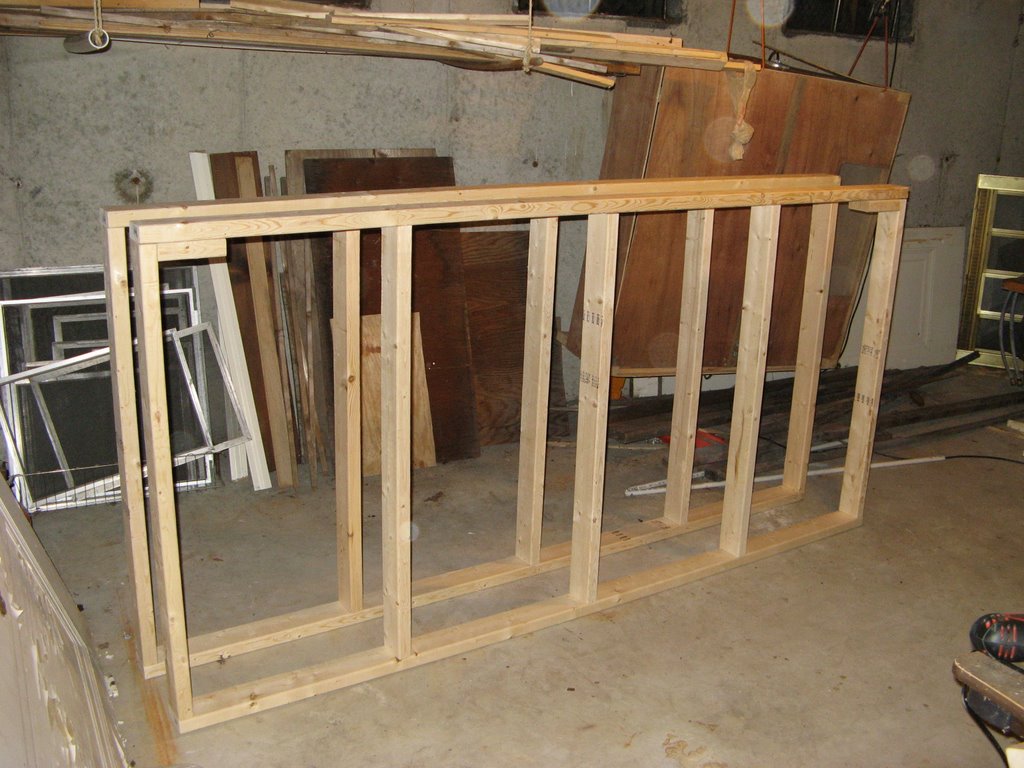
 I’m continuing to build the new chicken tractor, egg mobile, mobile coop or whatever it's called I started it last week. Finally, I finally found the 1x2 inch wire for the floor. It took 7 places, but I found some at Masse Hardware in Cambridge MA. I stapled the wire onto the bottom frame. Then I screwed the plywood onto the top frame. Then because the top frame was too heavy to carry outside, I unscrewed the plywood. That’s one reason I like screws better than nails. They are easier to undo. Because any further work will make the tractor to big to carry out the cellar door, I moved the project out to the garage. It’s a little awkward for one person to maneuver, but with a couple of sawhorses and some blocks I think I may manage. I’ve screwed the upright supports to one side of the bottom. The next step will screw them to the top frame which is actually the bottom in the photos and screw on the sides. After I do this to the other side, I should be able to remove all the sawhorses and blocks and will end up the tractor frame upside down. Probably there is a much easier way to do all this, but I’ll only figure it out after the fact.
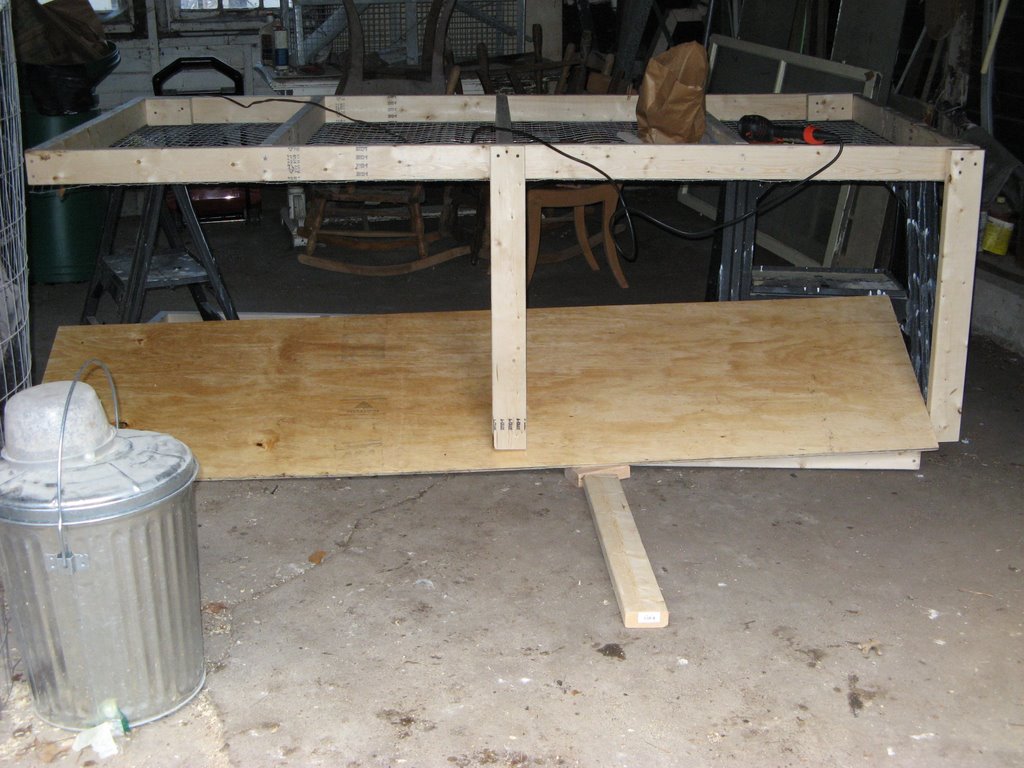 The first side. It's not screwed on yet. It's just proped up for the photo.
 My 4 hens have a little coop that I built about three years ago. It was one of the first things I ever built. It's OK but when I move it into the garage during winter. I feel the need to fashion a little pen around it for snowy days when the chickens can't go outside because the coop is only 4x4. The coop is fine in the garage, but the pen just takes up too much room. I also want something that I can move myself. I've decided to build them a tractor like I read about here. It will have twice the space as my coop and I will be able to move it around by myself. I've built some chicken tractors before. The first ones I build for broilers are all scrapped now. They were just too small for broilers and were rather flimsy too. I think broilers work better in a day-range system. The next tractor was a hoop style shown first in this post I helped my friend Judy build the next year. It is a nice one, and we day ranged two batches of broilers or 175 chickens in all that year with it at her place. It's also good to use to start seeds in the spring by covering it with plastic but that design is way way too big for my tiny back yard. Then last summer I helped put some very final touches on the mobile coop in the second photo in the post. It's quite a fancy coop. The first time I saw it, I thought it that I would like to have it for a summer house for myself. I could just hook it on the back of my car, and tow it to the country. :)
