Monday, February 19, 2007

Mini Ohio Boooder

Baby chicks need to be kept very warm for the first weeks of their lives. Providing heat for them with heat lamps or other means is called brooding. The first week they need to have the temperature at 90 degrees F. Each week the temperature can be lowered 5 degrees.

The other day when I had plenty of other things that I was supposed to be doing, I decided to build another chick brooder. I’d been thinking about it for a while and guessed that I could build it from scrap wood and other bits of stuff I had leftover from other projects. A few years ago I built a 4’ x 4’ Ohio brooder like the one described here. It will brood (keep warm) up to 250 chicks. I brooded a batch of 75 and then a batch of 100 chicks in it. And all went fine. The main feature of this type of brooder compared to the usual heat lamps is that this type uses about ½ the electricity and is able to use regular house hold incandescent light bulbs instead of the 125 or 250 watt heat lamps.

I made this new brooder about 24 inches by 26 inches. I wanted one about ¼ the size of the original one and found a piece of ½ inch plywood 24 x 26 so went with it. I should be able to brood up 50 to 60 chicks. The sides are 1 foot wide pieces of wood and the legs are 16 inches high. I removed the wiring from my old 4 x 4 foot brooder and put it into this new one, figuring I wouldn’t be using them at the same time anyway. The cords were from old computer monitors. I had partially lined the first brooder with bubble foil insulation which I removed for this new brooder. I didn’t have enough to cover the whole inside, but remembered I did have some bubble wrap. I just took aluminum foil and covered the bubble wrap to make homemade bubble foil insulation and even found some foil tape to tape it on. This was an easier improvement over my original method of gluing the insulation on. On my fist brooder the cover sits down in the frame about an inch. On this one the cover rests on top. I actually like and recommend the first way better and wished I had done this on like that. I think it has less air gaps in the top that way.

For amusement I tested it out in a room that was 57 degrees F. With two 60 watt bulbs it was 91 degrees inside. With a 100 watt and a 60 watt bulb it was 101 degrees inside. I’m guessing that having chicks in it might raise the temperature a bit also. The reason I built it with two lamps it to have some backup if one burns out.

It was fun to make. I made it with things I already had around and now I have an excuse to get some chicks.

Note: Unlike what I did, make the legs 1 inch down from the top and make the frame the correct size for the plywood top to rest inside the frame on the legs.

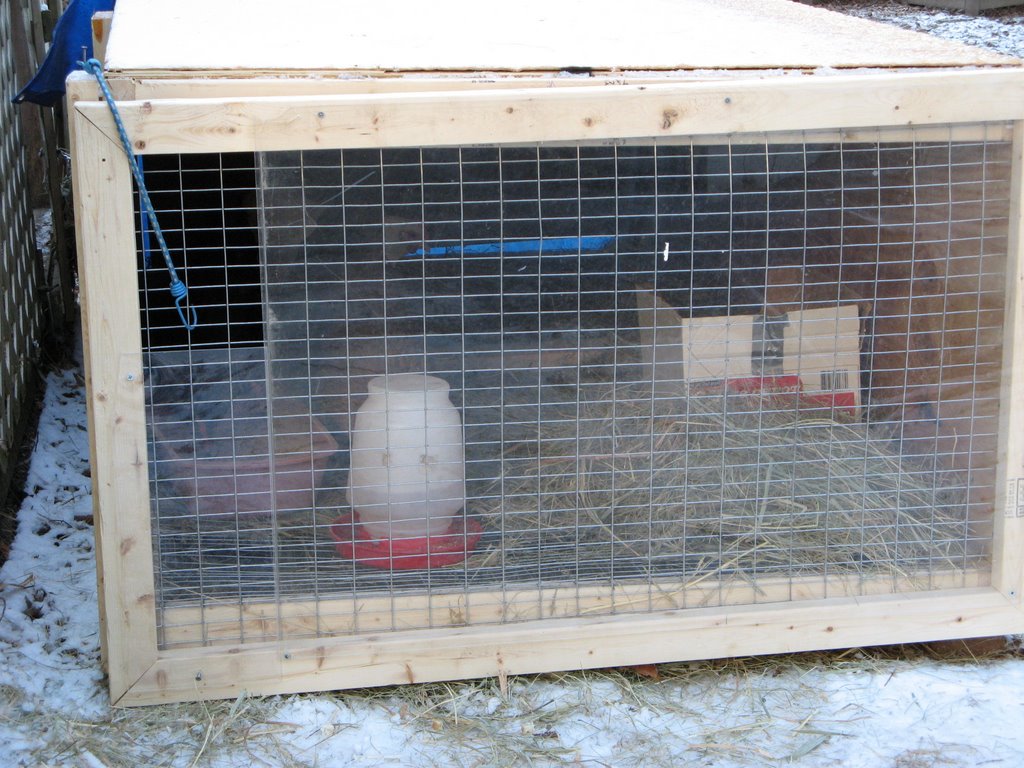
brooder with cover on


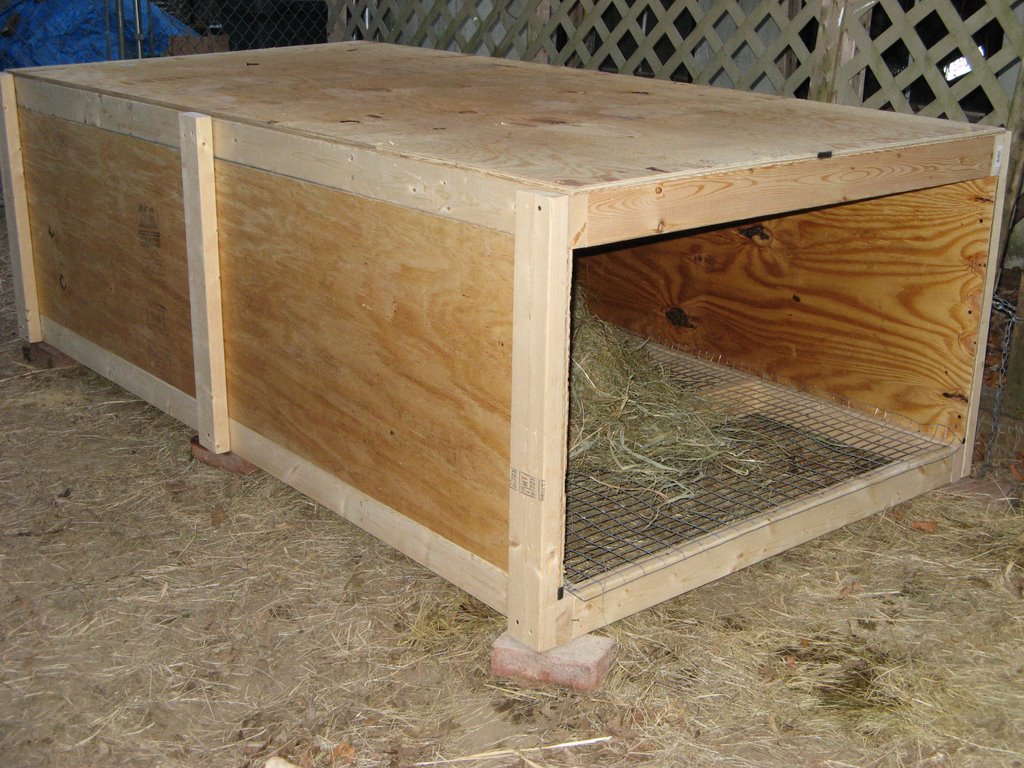
brooder with cover off showing bubble foil insulation

Friday, February 16, 2007

Chicken en Croute and Egg Thief

If you've landed here looking for a chicken with crust recipe, keep googling because this is a chicken coop encrusted in ice.

I haven't had time to work on the new chicken tractor/coop. The only thing different from my last post is that it's encrusted in ice. It may only look like snow on the top, but it's very icy and solid. It still needs wheels. If the wheels were already on, I could have easily moved it into the garage for the recent ice and snow storm, but it's habitable so other priorities win out for now and it sits on bricks instead of wheels.

I'm now toying with the idea of adding a third door. This would be a chicken size door so that the chickens could come and go during the day, but the large egg thief shown below couldn't get inside. Better dog training would be an alternative to the door and I'm considering it also. I've been kind of letting the egg stealing slide because he's been pretty good with the chickens lately. He wasn't always and there have been past problems chasing chickens. When a dog chases chickens, the chickens panic and flap a lot and that seems to elicit even more prey instinct in the dog. It becomes a bad and vicious circle with potentially fatal results for the chickens. The other day, watching from the window, I saw him mostly inside this new coop with chickens still inside it. I held my breath. Eighty pounds of dog and panicking chickens inside a coop this small would be ugly. He slowly backed out with an egg in his mouth. I exhaled. I guess it's better eating eggs rather than chickens, but eating neither would be best.

With the old raised coop, he only ate eggs that I put aside and forgot. I didn't realize that making the new coop low would give him access to the eggs and that I'd create yet another dog training opportunity for myself.

Kahlil eating an egg he just stole from the nest box. He doesn't seem to be bothered by the feather that came with it that's tickling his nose

Sunday, February 04, 2007

Chicken Tractor - Step 4

Today I needed to make the new tractor habitable because tomorrow roofers will be working on the building where their old coop is located. I tacked some plywood onto the back and covered it with a tarp. This is the west end and it is the direction most winds come from here so I wanted it to be draft proof if possible. The bricks holding the tarp should prevent some wind from coming in from underneath.

I screwed the front door on and added a 2x4 inside to roost on and then threw in some hay over the wire floor. I figured the chickens were not used to walking on wire and the hay would be less of a change for them at first. Tonight will be 8F. with 20-30 mile an hour winds. I figured the hay would help keep lessen any draft so I also added some to cover the opening at the bottom between the tractor and ground.


The front door is covered in plexiglass that I got from an old storm door, and a small piece from another project. An area about 8x10 inches is left open in the upper left corner for ventilation.

Here is a view looking in from the front. The chickens are used to roosting higher so having a roost that is only 2 inches high, for now, will be an adjustment.

The next step will be to get some wheels onto this thing to make it mobile.

Update: I just went out with a flashlight to check on the chickens. They are in the front right corner and one is in the nest box. I guess they don't consider a roost that's 2 inches high a 'real' roost, or they are smart because I think they picked the most sheltered area in which to bed down.


Friday, February 02, 2007

Chicken Tractor - Step 3


Too many other household projects have kept me from working on the new chicken tractor. Today my nephew Philip helped out. We finished screwing every thing together and moved it out of the garage. It's heavy so it's a good thing Philip is strong. It has no roof yet, no doors yet and no wheels yet, but it's all together. The next step is doors, because even without the roof and wheels it will be habitable.