Monday, January 29, 2007

Chicken Tractor Step 2

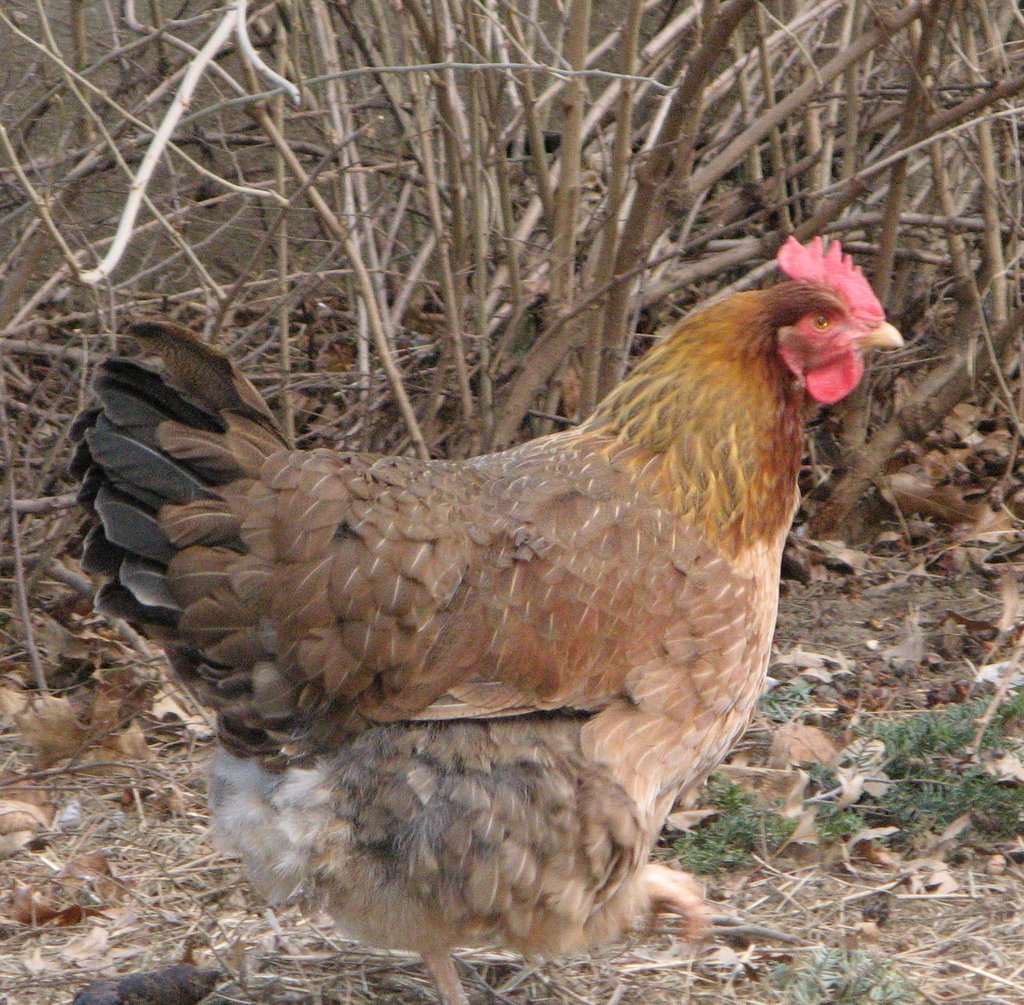
One of the future occupants of the new chicken tractor, a Welsummer hen

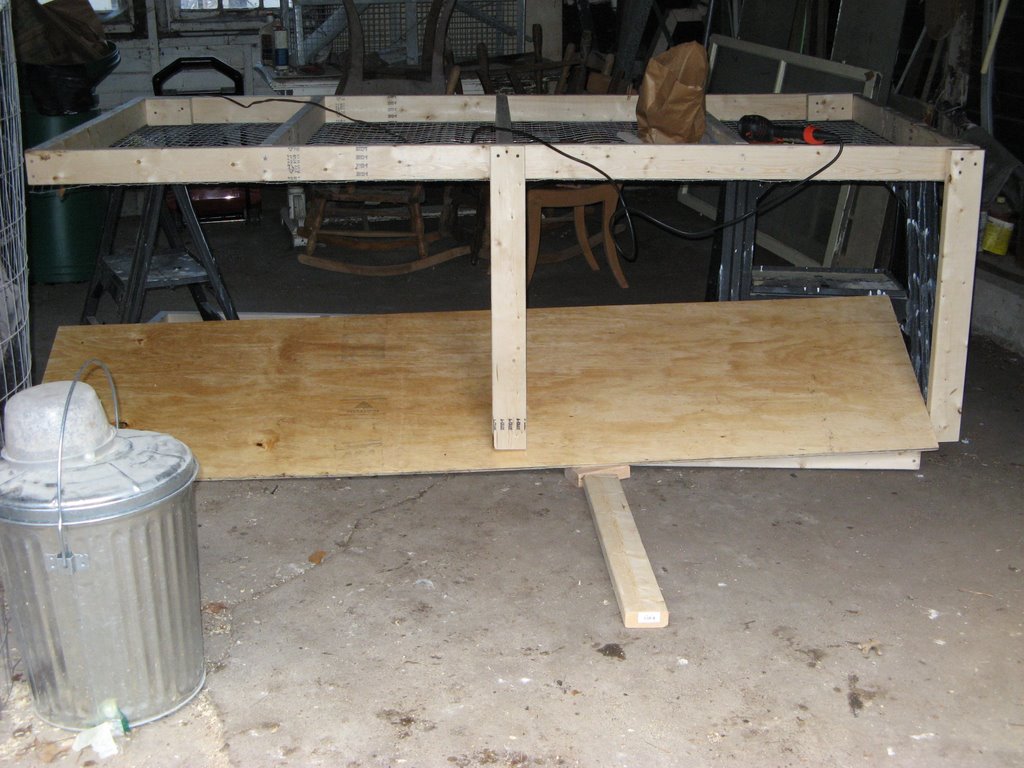
I’m continuing to build the new chicken tractor, egg mobile, mobile coop or whatever it's called I started it last week. Finally, I finally found the 1x2 inch wire for the floor. It took 7 places, but I found some at Masse Hardware in Cambridge MA. I stapled the wire onto the bottom frame. Then I screwed the plywood onto the top frame. Then because the top frame was too heavy to carry outside, I unscrewed the plywood. That’s one reason I like screws better than nails. They are easier to undo. Because any further work will make the tractor to big to carry out the cellar door, I moved the project out to the garage. It’s a little awkward for one person to maneuver, but with a couple of sawhorses and some blocks I think I may manage. I’ve screwed the upright supports to one side of the bottom. The next step will screw them to the top frame which is actually the bottom in the photos and screw on the sides. After I do this to the other side, I should be able to remove all the sawhorses and blocks and will end up the tractor frame upside down. Probably there is a much easier way to do all this, but I’ll only figure it out after the fact.


The first side. It's not screwed on yet. It's just proped up for the photo.

Sunday, January 21, 2007

New Chicken Tractor - Step 1

My 4 hens have a little coop that I built about three years ago. It was one of the first things I ever built. It's OK but when I move it into the garage during winter. I feel the need to fashion a little pen around it for snowy days when the chickens can't go outside because the coop is only 4x4. The coop is fine in the garage, but the pen just takes up too much room. I also want something that I can move myself. I've decided to build them a tractor like I read about here. It will have twice the space as my coop and I will be able to move it around by myself. I've built some chicken tractors before. The first ones I build for broilers are all scrapped now. They were just too small for broilers and were rather flimsy too. I think broilers work better in a day-range system. The next tractor was a hoop style shown first in this post I helped my friend Judy build the next year. It is a nice one, and we day ranged two batches of broilers or 175 chickens in all that year with it at her place. It's also good to use to start seeds in the spring by covering it with plastic but that design is way way too big for my tiny back yard. Then last summer I helped put some very final touches on the mobile coop in the second photo in the post. It's quite a fancy coop. The first time I saw it, I thought it that I would like to have it for a summer house for myself. I could just hook it on the back of my car, and tow it to the country. :)

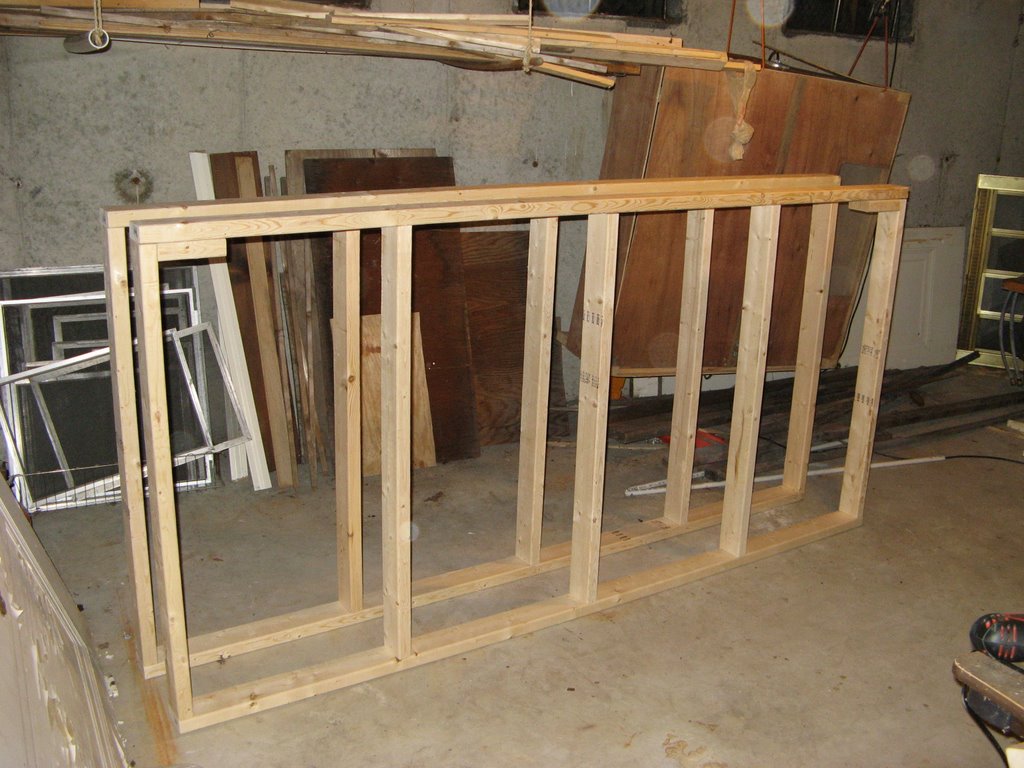
So what you see in the photo, other than my messy workshop, is the top and bottom frame for the new chicken tractor. Those pieces will fit out the cellar door so I was lucky to be able to build them inside on this cold windy day. The pieces measure 4x8 and used 13 2x4s and some deck screws. I still need to go get most of the materials so sadly I probably won't get to work on it again until next weekend.

Tuesday, January 16, 2007

An Easy New Years Resolution


Among the other things that I got for Christmas, was bronchitis. My cough finally seems like it’s going away. I’ve been taking it easy and my blogging fell a little by the wayside, but hopefully I’ll be back to blogging more now.

I thought of a New Years resolution that didn’t take much effort. It’s so easy that I already did all the required “work” by the last week of the old. year. My resolution was to buy and install at least one compact fluorescent light bulb. After studying the idea I realized that if everyone did this, the impact on energy usage would be huge. We’d all also save some money.

My municipally owned electric company charges 11.38 cents per kilowatt hour. At this time of year I burn a 75 watt bulb for at least 5.5 hours each night during winter in the room I sit in during the evening. A compact fluorescent bulb that gives the same amount of light uses only 20 watts.

Old 75 watt bulb
12375 watts each 30 days = $1.41 electricity cost

New 20 watt compact fluorescent (75 watt equivalent) bulb
3300 watts each 30 days = 37.5 cents electricity cost

Savings with this one bulb in 30 days is 9075 watts and $1.03 in electricity cost. I paid .$1.04 including tax for this bulb so it will be all paid back at the end of the month.

The bulb seems just as bright and doesn’t flicker, or buzz. It may have a very slight green tone, but it really seems very very close to a regular incandescent bulb. It does NOT resemble the light from the florescent tube type light bulbs in my shop in the cellar.

I was so happy with the outcome that I bought some more bulbs for other rooms. Watch the price of the bulbs. They seem to vary wildly from store to store and even within the same store. I found a 75 watt equivalent for 99 cents in a local hardware store. In H*Depot I bought 4 100 watt equivalent for $8 a package and 4 60 watt equivalent for $4 a package but saw others for more. A friend told me some electric companies give them away for free so it may be worth checking that out.


Below is a 100 watt equivalent and a 60 watt equivalent. The size is proportional to the wattage, but I had no trouble using any size in the lamps I have.

Saturday, December 16, 2006

Kahlil and Herman

In order to avoid some Christmas shopping I needed to do today, I decided my dog Kahlil needed exercise. So I walked him down the lane next to the cow pasture at Codman Farm. The pasture is full of "normal" cows and this one little water buffalo steer named Herman. I'd met Herman before when I had to go into the pasture for the White Rock broiler chicken project. Cows scare me a bit. They are big. Some Holsteins look as big as minivans. I once climbed into the chicken tractor because I thought a young curious bull had come too close. I wouldn't leave until someone else came into the pasture to escort me out. I knew that bull could tell I was afraid. People came and went and he never bothered them, but he made me nervous. I was kind of glad when he moved on to where ever bulls go when the get older, the auction, the freezer, I don't really know, just some place where at least he won't frighten me. Herman is different. He's not intimidating. He's very friendly. He likes people. He likes attention. I'm not at all afraid of him. He's from a breed that produces buffalo mozzarella.
When Herman came to the fence, Kahlil acted the way he would around a dog that size. He looked away from him and wouldn't make eye contact. Herman lowered his head to put it through the fence. His body language must have not looked aggressive to Kahlil because Kahlil tentatively went to him. They smelled each other barely touching noses. Then Kahlil rested his muzzle on top of Herman's face. They have both been conditioned by humans to be friendly, but you do have to wonder what goes through their minds at a moment like this.

Don't forget to head over to Sweetnicks for Weekend Dog Blogging each Sunday night.

Wednesday, December 13, 2006

Chicken Butchering – Part 4 – Evisceration

Part 1 Prep
Part 2 Slaughter
Part 3 Plucking
Part 4 Evisceration and
Chilling
Part 5 Eating & Freezing Part
6 Final Thoughts

After trying to write this post, I concluded that a movie would make a lot more sense. Maybe next year I'll try that, but for now, this is it.

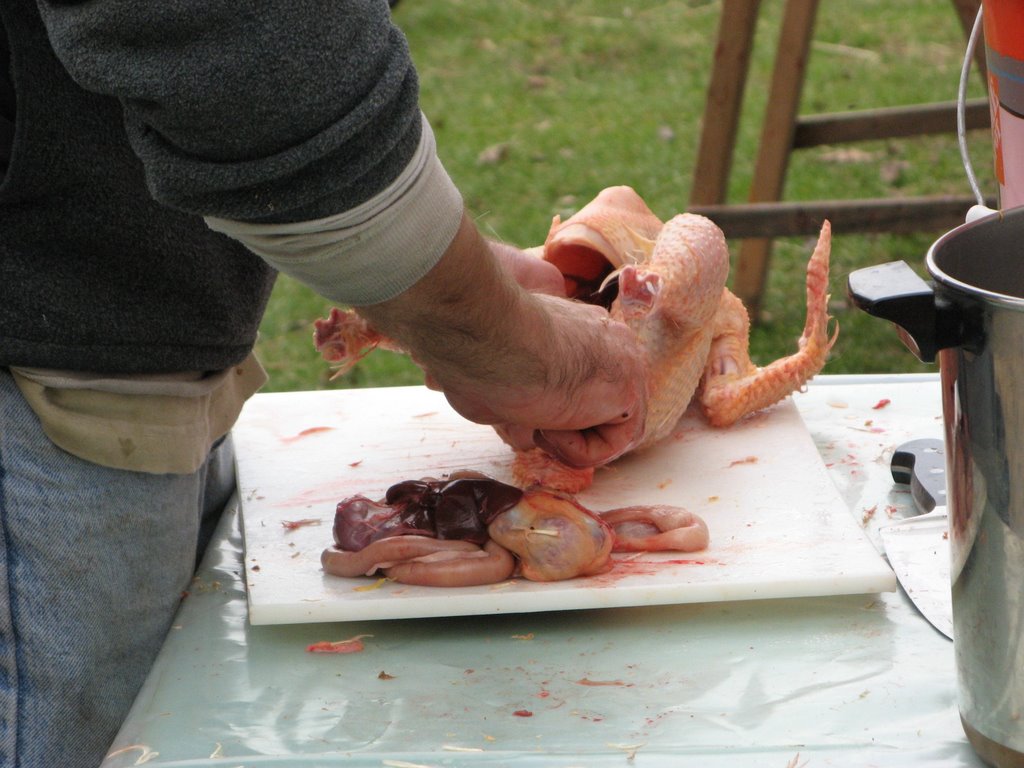
Eviscerating a chicken is the process of removing the insides. It's one of those things that is much easier to show someone rather than write down the process. I'm not sure this post will be of any help in explaining how to evicerate a chicken, but I suppose the pictures show something that people don't often get to observe. Just as there is more than one way to skin a cat there is more than one way to gut a chicken. The follow is what has worked for us.

Step1. After the chicken is finished being plucked, remove the feet. These are removed at the joint. We used a knife to do this, but I think some kind of poultry or garden pruning shears would have been easier.
Step2. Slice off the oil gland. This is on the top (if the chicken is standing up) of the tail.
Step3. Cut off the neck close to the body and save it for soup. At the neck opening you will see two tubes going into the chicken. The smoother one is the esophagus which goes to the crop and the one that looks like a vacuum cleaner hose is the trachea. Loosen them from the body.
Step4. Lay the chicken on its back with the tail facing you. From just under the end of the breast bone, start to cut the skin. Cut down toward the vent about maybe halfway. You want to be careful not to knick the intestine, so you might want to pinch or hold the skin toward you as you are doing this. Now cut the skin from the bottom of the incision to each side. The incision will be an upside down T at this point and should be big enough to squeeze your hand through. If it's not then enlarge it. Do NOT cut all the way down to the vent though.
Step5. Now comes the fun part. You are going to reach inside. The first time I did this I was surprised that it was warm inside a chicken. After years handling chicken for food prep which of course comes from the fridge very cold, I was initially surprised to put my hand inside a chicken and find it warm. It shouldnÂ’t have been a surprise, but it was.
Step6. As you are squeezing your hand through the opening that you just made, run your fingers up along the breast bone. When you are all the way in, grab whatÂ’s inside and pull it out. It takes a little force, but remarkably most all of the insides come out. Do not detach the intestine from the vent just yet.
Step7. Now, cut around the vent. This will be a cut the is shaped like a U. This will separate what you just pulled out and you will have removed the vent without cutting the intestine. You are almost done now and you chicken looks like a “normal” chicken.
Step8. It is possible that when you pulled out everything from the inside the lungs stayed behind. If you do not have a ‘lung puller’ (yes, there is such a thing) then reach in with your index and middle finger and scrape out the two redish pinkish things that are on the bottom and forward.
Step9. If it is a rooster you will notice two things are the size beans on the back of the chicken inside. These are the testicles and can be removed also. IÂ’ve often seen them missed in chicken that I got from the store.
Step10. Now rinse the chicken thoroughly with water inside and out.
Step11. Now you are finished and want to get the chicken cooled down. We fill tubs cold water and ice and chill the chickens down quickly in the ice water for a while before refrigerating them

Store bought chickens usually come with their, liver, heart, and gizzard. For this batch of chickens we saved the hearts and livers and I gave the feet and gizzards away to a friend at work who took them. NOTE. When you are separating the heart and liver from the rest of the insides, you must be careful not to break the gall bladder. It's the greenish thing connected to the liver. If it breaks, bile comes out. We tossed out any liver that bile got onto and then very thoroughly washed any cutting board or knife that bile got onto if we did break the gall bladder.

Shows after the insides have been removed. The large round thing is the gizzard. The dark thing is the liver. Below the liver, is the intestine.

Wednesday, December 06, 2006

Chicken Butchering – Part 3 – Plucking

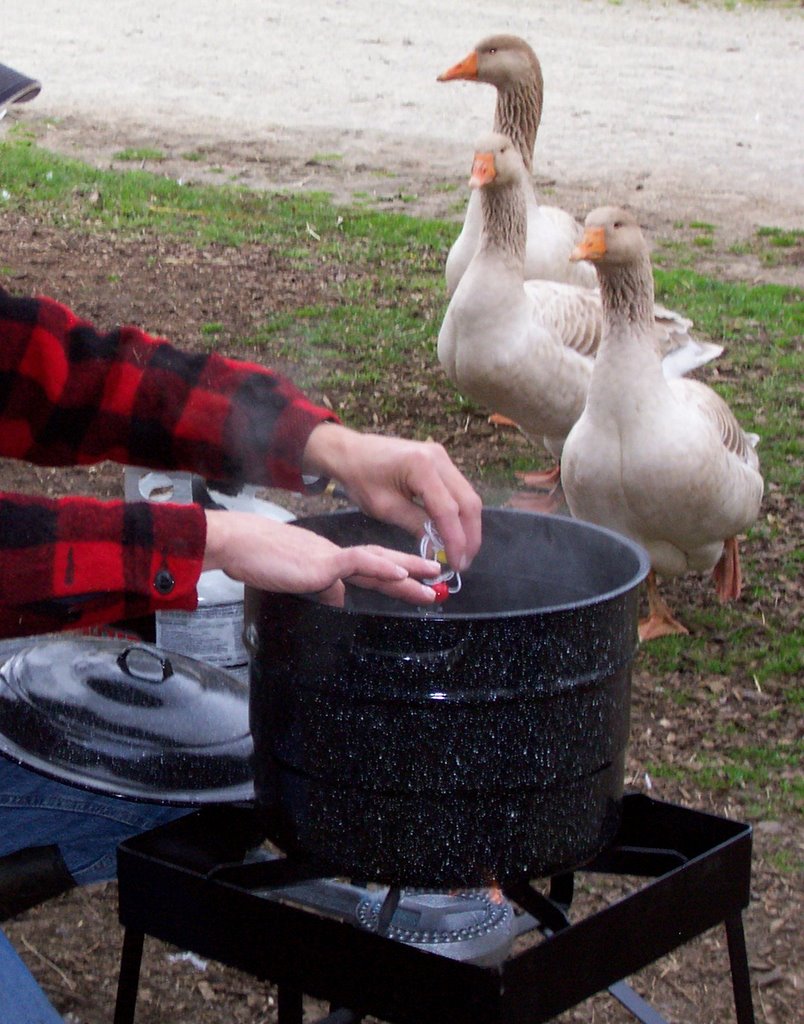
Once the chickens have been killed and bled out, the next step is plucking. Before the chickens are plucked they need to be dunked into hot water to loosen the feathers. We set up a large pot of water on a propane burner and heated it up to about 150 degrees. If you gather together five people who have plucked chickens, I suspect you will get 6 opinions as to the correct temperature and amount of time for this scalding step. If the scald is too hot or long then the skin may tear when you pluck. If the temperature of the scald is too low then the feathers will be very difficult to pluck. The person doing the scalding and plucking eventually gets the feel for the perfect scald temperature and time...

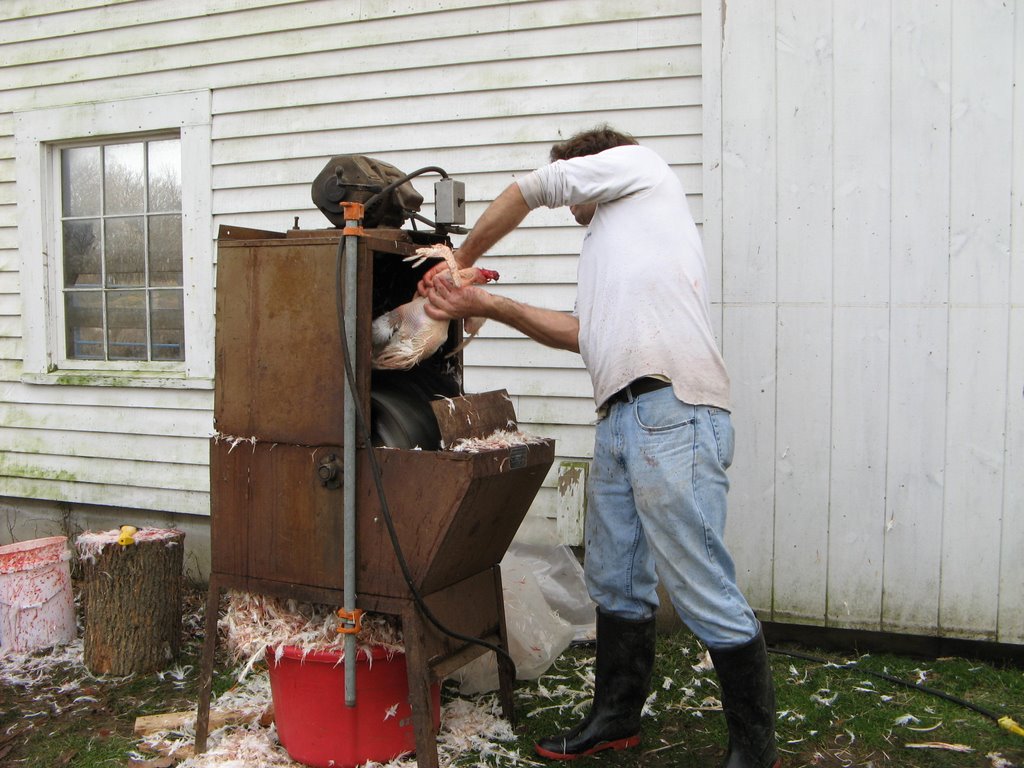
The first batch we butchered we hand plucked some and machine plucked some. By the time we did the second batch we had gotten the knack of the machine plucker and were doing them all by machine. The machine is ancient, but still does the job. It consists of a rotating drum with rubber finger like things that stick out. As the chicken is held against the rotating drum, the rubber fingers pull the feathers off. In addition to drum pluckers like we used, there are tub pluckers. These are even easier. You just put the scalded chickens inside and they are plucked clean with out even holding them.

Part 1 Prep
Part 2 Slaughter
Part 3 Plucking
Part 4 Evisceration and Chilling
Part 5 Eating & Freezing
Part 6 Final Thoughts
Checking the temperature of the scald while some geese look on. The knew it was chicken butchering day and they were safe :)

Plucking a chicken with the old automatic plucker.

Making sure the plucker did a good job.

Plucking by hand.

Sunday, December 03, 2006

Chicken Butchering – Part 2 - Slaughter

In my first post on this topic, I explained how the chickens were fed and brought to the area where we slaughter and butcher them. This post is graphic so click away if chicken slaughter is not something you wish to see or read about just now.

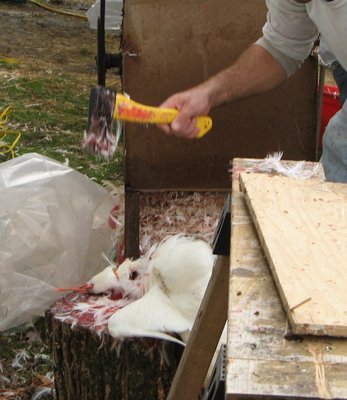
There are a number of different steps involved once the chickens are rounded up. The first is the actual killing. There are a number of humane ways to achieve this. Some people cut the jugular vein. Some wring the necks and others chop off the heads. The easiest one for us physically and emotionally was to chop their heads off. This was done with a hatchet. We opened the door of the coop reached in, took a chicken and carried it to the chopping block. The chicken is laid across the block and a loop of string is placed around its neck. This loop is so the chicken will not move just before the ax falls. The chopper holds the feet of the chicke and swings. Each of us who swung the axe did not fear killing the chicken. Rather, not killing the chicken was a far greater fear. Our goal of a quick death for the chicken helped us be careful and accurate in our swing.

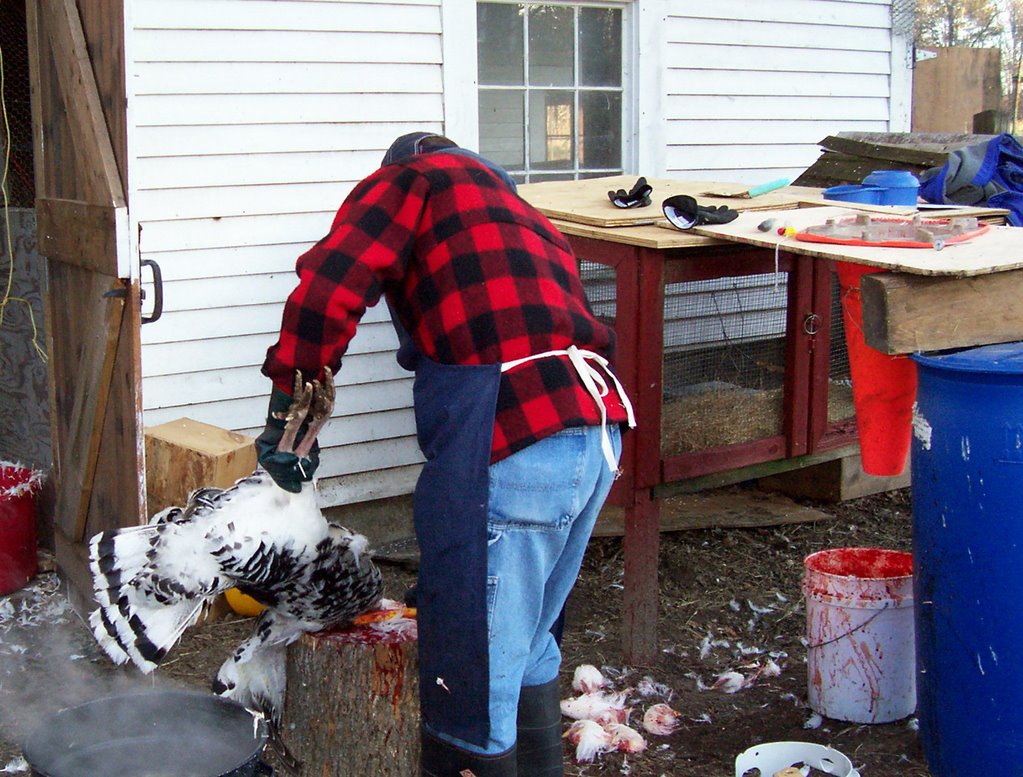
We’ve all heard stories about chicken running around with their heads cut off. Based on how much flapping of wings occurs while we hold the feet of a headless chicken, I believe this would be true. Out of respect for the chicken and fear of creating a big mess I don’t believe in testing this theory. After the head was severed, we placed the chicken upside down in a cone to finish bleeding. Under the cone is a bucket to catch the blood. The next step after the chicken is finished bleeding out is plucking. I’ll describe that in my next post of this series.
Chicken Butchering
Part 1 Prep
Part 2 Slaughter
Part 3 Plucking
Part 4 Evisceration and Chilling
Part 5 Eating & Freezing
Part 6 Final Thoughts


chicken slaughter

My Thanksgiving turkey, a Royal Palm, about to be slaughtered. Note the cone on the right for bleeding the chickens. The turkey is too big for this cone and needs to be held in a bucket instead.

Tuesday, November 28, 2006

Warm Fall

We've had such a warm fall here in Massachusetts. I just noticed this dandelion blooming in my front yard and it actually looks like the grass needs cutting. It's practically December!
Just a few weeks ago I brought this geranium inside to winter over. I probably could have left it outside if I had covered it on frosty nights. There really hasn't been a hard sustained frost yet. My rosemary and sage are still hanging on.

Sunday, November 26, 2006

Chicken Butchering - Part 1 - Prep

As you may remember from earlier posts, I'm involved in a pastured poultry project at Codman Farm. We are raising some White Rock chickens out on pasture. They spend their days outside in the cow pasture and at night they go into the mobile coop to sleep and be safe from owls and other flying predators. Ground predators are stopped by the portable electric fence that surrounds them. Every few days the mobile coop is moved to a new area so they can have fresh pasture.

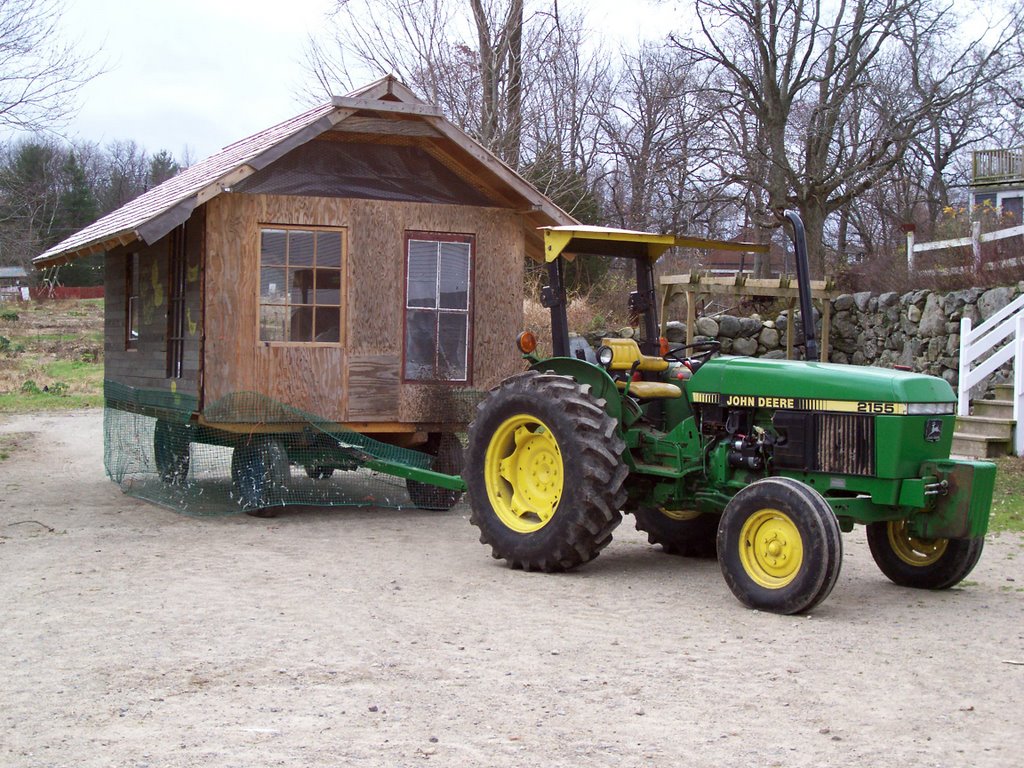
Last Monday was butchering day. The first step started the day before. Instead of giving the chickens their usual afternoon feed and water, they are only given water. Essentially they are on a clear liquid diet for the 12 hours before butchering. This insures that there is little or no food in their digestive tract. That will make an easier and cleaner job the next day. The next morning they are brought to the area where we will kill and butcher them. Because they sleep in the mobile coop, this job is very easy and does not involve chasing or catching or stressing the chickens. Heidi drove the tractor to the field, hooked up the mobile coop, and towed them back. It's a really simple way to "round up" 124 chickens.

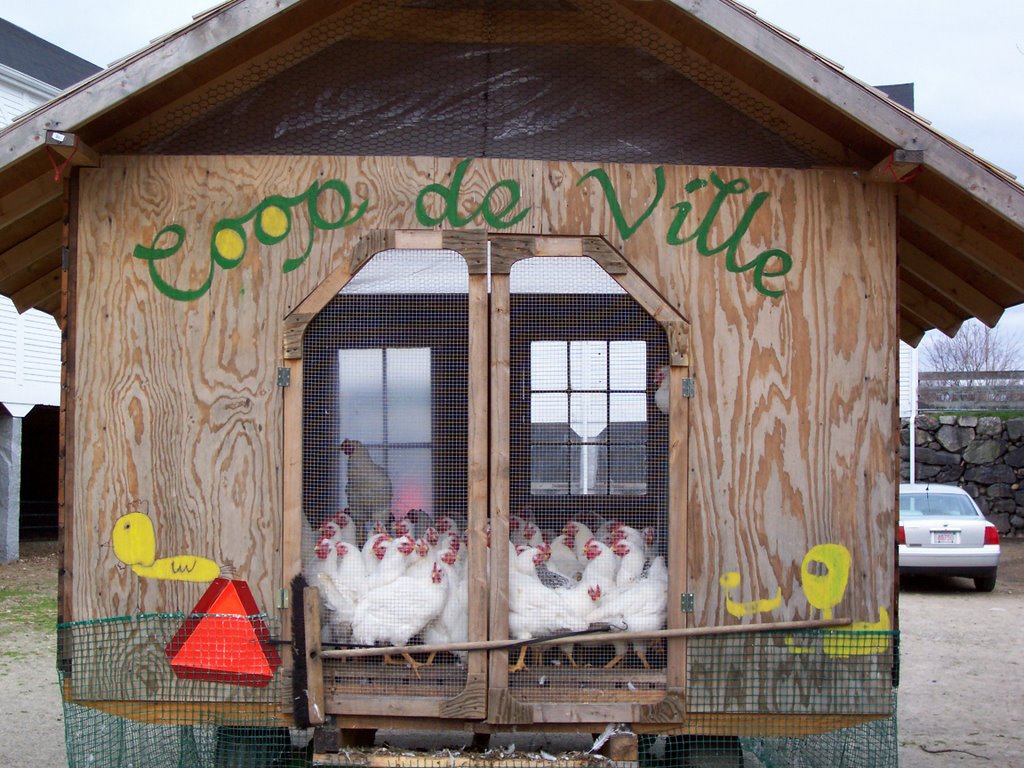
From the other side of the coop you see can the chickens all at the anxious to get out. It is a simple matter to open the door and take one out at a time to butcher. One feature of the mobile coop that you can not see from the picture is that the floor boards are spaced so that much of the manure falls out. This means that the coop doesn't need constant cleaning. The manure that falls fertilizes the cow pasture.


NOTE: I'm wondering if this chicken butchering series is going to bother anyone. I plan to indicate in the title what will be covered and have some text before the pictures so people have a chance to leave if they don't want to look at the pictures. What does everyone think? I really don't want to upset upset someone who is unprepared. For those of you who are really interested in the process, another blogger has created a really great video clip of the process which you can see here.

Friday, November 24, 2006

Thanksgiving Squash


Thanks to Helen of Beyond Salmon for giving me an idea of what to do with the delicata squash that I grew this summer. I made a variation of her recipe for Thanksgiving dinner.

Sunday, November 12, 2006

I'm Still Here - New Camera on the Way

Wow It's hard to believe it's been almost a month since I posted. I've finally ordered a new camera to replace my old one that bit the dust. I've borrowed a camera in the mean time, but it's just no fun using it and I don't like posting without a photo. I've decided on a Canon Powershot A710 to replace my Nikon Coolpix 950 that I did love despite the fact that it was a 2 megapixel camera and quite old. I should have the new one in about 1o days.

In the mean time, here are some photos of sunflowers. Where I plant my vegetable garden, sunflowers grow wild and I always leave or transplant one or more to act as "poles" for something climbing. Last year I grew Romano pole beans on some sunflowers and this year I grew yardlong beans one sunflower stalk. When the sunflower is a few feet tall I pinch the ends to make it branch to give the beans more places to climb. As the beans grow up the plant I also pull off as many leaves from the sunflower plant as I can without killing it. This is to let more light in. This was my first year growing yard long beans. I didn't like the taste as much as regular string beans, but I did like it enough to grow them again. Each beanpod is about 18 inches long . That makes harvesting go really quickly.
If you click on the photo for a larger image, you can see some of the yardlong beans hanging on the right side of the plant.

Friday, October 13, 2006

Chickens on Pasture

finally, a few weeks ago the broiler chicks were moved out to the pasture. They are locked up in the mobile coop at night for protection and let out during the day. They are surrounded by electric fencing to protect them from predators or overly curious cows with whom they are sharing a pasture. The vast majority of chickens raised in our country never even go out of doors for their entire lives and live in very crowded conditions. I'm so happy to be raising my meat in a healthier and more humane way. People ask me how I can butcher and eat something I helped raise myself. These same people eat supermarket chicken with no qualms.

Tuesday, September 26, 2006

How to Weigh a Chicken - The Easy Way

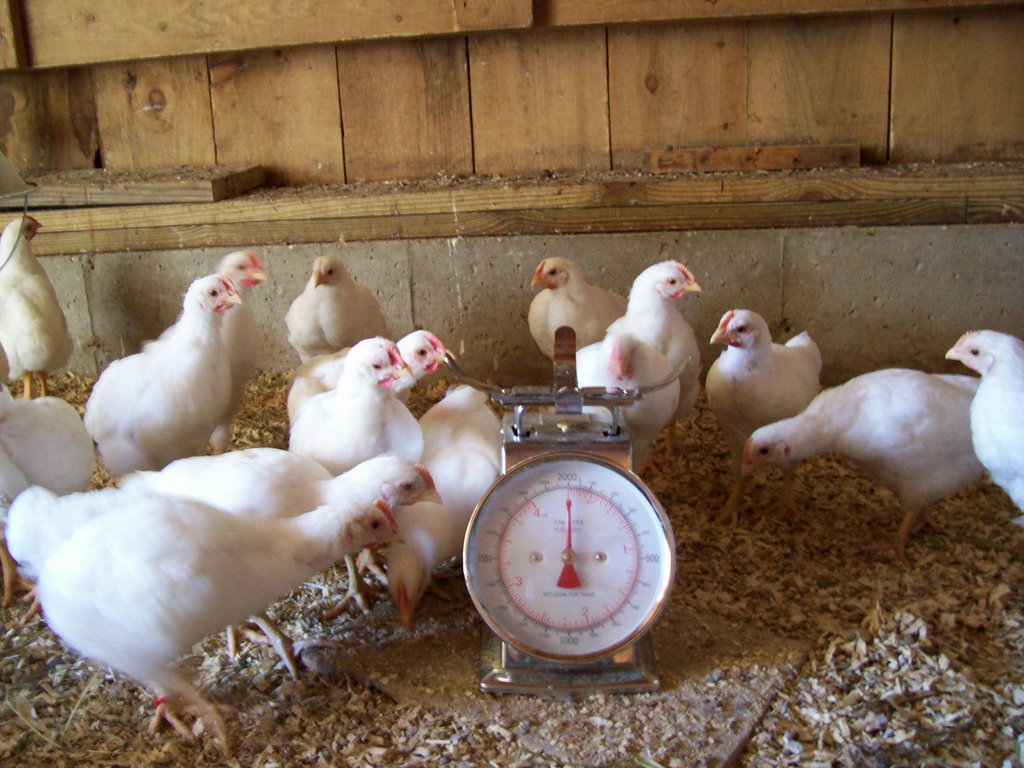
Before today, each week I used to catch some of the chicks, put them in a cardboard box and weigh them and record the average weight. Today I couldn't find the cardboard box. The chickens showed me a much easier way to weigh them. Less than 30 seconds after putting the scale down, a little rooster would jump up and weigh himself. I'd record his weight, shoo him off and wait for the next one to jump on. I weighed three of them today this way. The average weight of these White Rocks rooster chicks was 1 pound 5.7 ounces. They are 6 weeks old.

Tuesday, September 12, 2006

Little Cottage?


Camera angle can mean so much. What appears to be a little country cottage is really an A-frame pig shed. The other side of the fence is mostly mud with a couple of very pregnant Tamworth sows wallowing in it. If my camera had not broken, I was going to take a photo from the other direction. This is one of the perennial plots (not mine) where I have my community garden at Codman Farm in Lincoln, Massachusetts, USA.

Chick update: At 4 weeks old today, the White Rock Roosters weighed an average of a little over 10 oz. each.

Note. My camera (Nikon Coolpix 950) broke! I don't have time to investigate or buy one before my daughters wedding. Any thoughts on what you love or hate about the camera you use would be appreciated for when I start the camera buying process. In the mean time no more baby chick update photos.

Tuesday, September 05, 2006

Okra

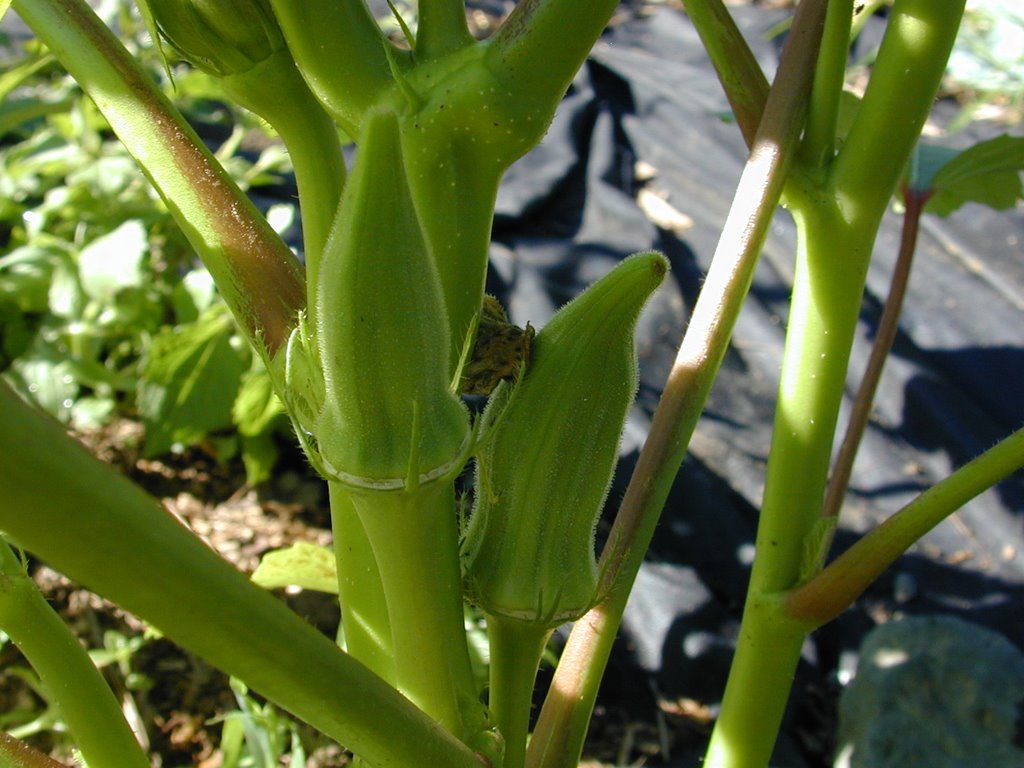
I like okra a lot. I love the taste and I think its tropical looking flower is beautiful. It's not exactly a staple of a typical New England diet and I often meet people who have never eaten it. It's not consistently available here in the market so I try to grow it. During our very cool very wet spring this year, I had to seed it three times before I was successful. I sowed it once inside in pots where it failed and twice outside. I was successful the second time outside. What I've learned is it seems to need lots of warmth which is not surprising because it's native to Africa. I've found it needs warmth even more than tomatoes or peppers do. Now that cooler September weather has arrived I fear it will soon stop producing. It's produces enough to eat or add to soup occasionally, but I wish I had enough to freeze. My plan for next year is to try and start it again inside, but I'm planning on adding a propagation mat to my collection of garden toys and hope that I will have more success starting it inside and unless it's really hot, I'll probably wait an extra week after Memorial Day before setting it out.


Saturday, September 02, 2006

Chicks 18 days old

The chicks are now 18 days old. They aren't old enough to go out on pasture yet, so we pull weeds from the garden and to give to them. They really love them and even eat the dirt. You can see in the photo below that they are starting to get their wing feathers.

Friday, September 01, 2006

White Rock Chicks

[[[ Sorry for the lack of posts. Things are busy in the garden, at work and most importantly I’ve been involved with my daughter’s wedding plans. The wedding will be in a couple of weeks and things are getting a bit hectic here.

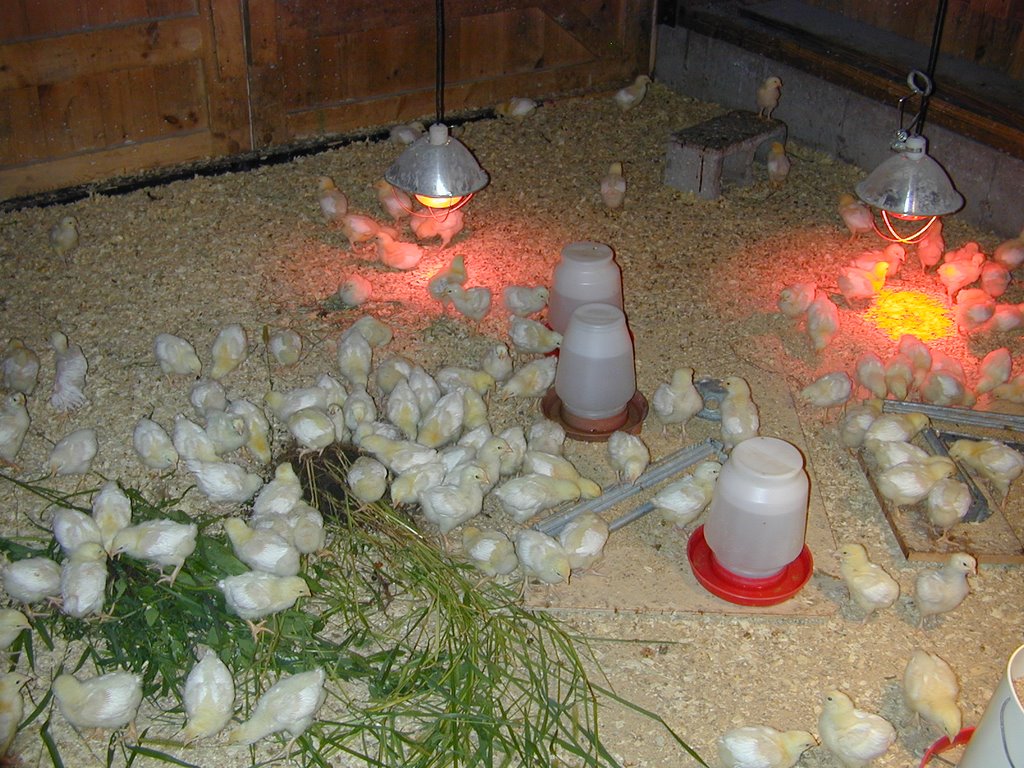
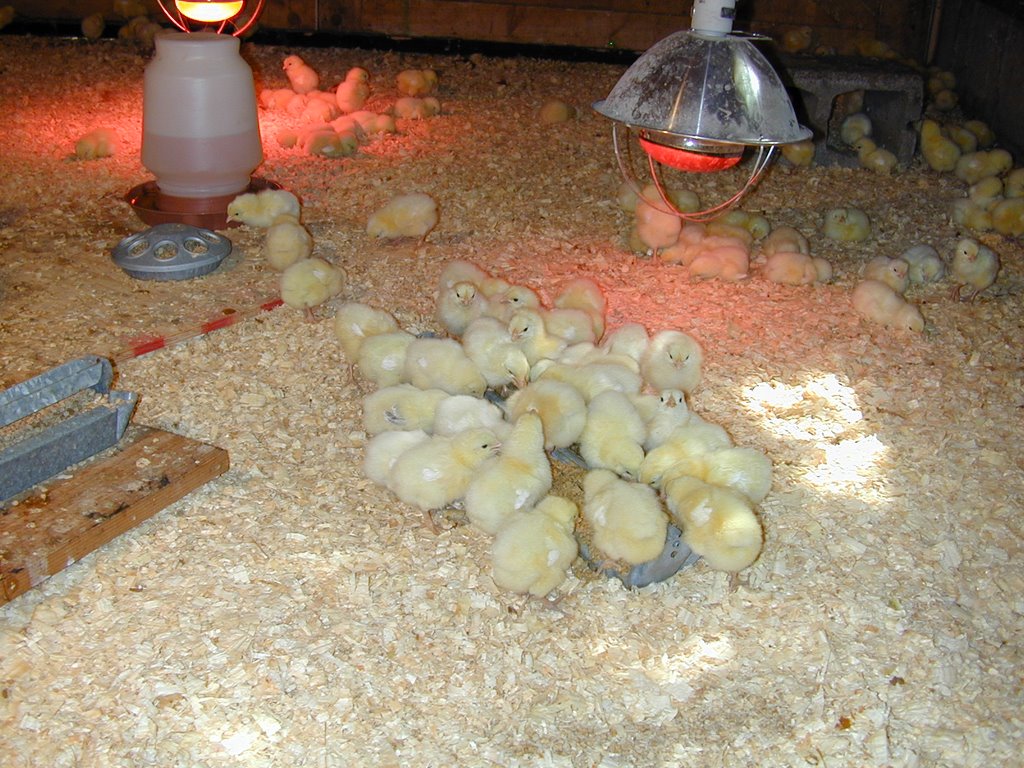
After some hatchery and post office delays the chicks finally arrived two weeks ago... They are 125 White Rock rooster but a few seem to be something different. They are in a room in the barn that’s about 11 x 11 feet square. Chicks need an area where the temperatures are 90 degrees in part of the area the first week and can tolerate the temperature to be lowered 5 degrees each week for the first 6 weeks. To provide this temperature there are two heat lamps hanging in their enclosed area. They can self adjust their temperature by moving closer or further form the lamps. The chicks were two weeks old on last Tuesday.

Each week I plan to weigh a sample of the chicks and keep track of their weights. We’re also keeping track of how long it takes them to eat each 50 lbs of feed.

So far the weights are;
At one week, a sample of 10 weighed an average of 2.05 oz. each
At two weeks, a sample of 10 weighed an average of 4.45 oz each

From the weights you can see they more than doubled their weight during their second week.
I intended to take a photo of them today and brought my camera to the farm. Unfortunately I forgot to put the memory card back into the camera before I brought it with me. This photo from the first week will have to do for now.

Thursday, August 10, 2006

Pastured Poultry - The Pen

One obvious problem being an urban agrarian is the lack of land. I squeeze what I can into my small suburban yard, grow plants where there’s a little sun, keep 4 laying hens and have a large community garden plot further out towards the country. Raising broiling chickens to fill my freezer would seem be out of the question. However, this will be the third year that I will be doing it. It requires finding a willing partner with some land. During the last two summers my friend Farmer Judy and I raised broiler chickens. The first year we raised 25 and the second year we raised 175 split between two batches of 75 and 100. I kept them for the first three weeks while they were in the brooder and then they went to her farm in southern Vermont for the next five weeks. The following year we raised 175 in two batches of 75 and 100 each. Judy won’t be doing it this year so I asked at the farm where I have my community garden, if I could raise broilers on my community garden plot. The answer was no, but one of the farm managers, Heidi was going to do pastured poultry and I discovered I could add my 25 into her batch and we would do them together. This was even better because figuring out how to make a coop or pen that I could transport to my garden plot would have been a challenge.

I’m hoping to chronicle my experiences and thoughts raising broiler chickens this year and over the last two years in a series of posts over the next few months. I plan on covering everything from brooding to butchering.

Once chicks are a few weeks old they do not need the extra heat supplied by their mothers or heat lamps and can go outdoors. For the most part commercially raised meat chickens never have the opportunity to ever be outside. They spend their entire lives indoors in cramped quarters in broiler houses with tens of thousands of other chickens. This is not the way I want the chickens I eat to be raised. Why I think this is better will be the topic of another post, but today’s post is about the shelter the chickens will have. Even though they roam and forage in the pasture during the day, they need a place that is safe from predators and weather to sleep in at night.

The first year Judy and I did chickens, I built a movable pen. This is a popular was to raise pastured poultry made famous by Joel Salatin. The pen has no floor and is moved to a new area of pasture each day, giving the chickens fresh pasture and leaving the droppings behind to fertilize the pasture. One of the problems with this idea was getting the pen light enough to move, but not so light as to fall apart. I built it 8x8 feet by 2 feet high. Sadly it ended up too heavy for us to move easily on hilly terrain AND it fell apart. It didn’t last long enough to even get a picture of it I then built two smaller pens half the size with the pieces from the broken first pen. That worked as far as the pens being easy to move and light, but we soon decided we didn’t like the pen idea. The pen required moving too frequently and the chickens seemed like they would be better off with more pasture. We started to let the chickens out of the pens during the day and only put then in at night. This seemed to work better and meant that the pens did not require moving as much because the dropping from the chickens during the day were not in the pen, but spread out over the pasture. This system is called day range. Ithe one that I prefer and has worked well for the last two years.

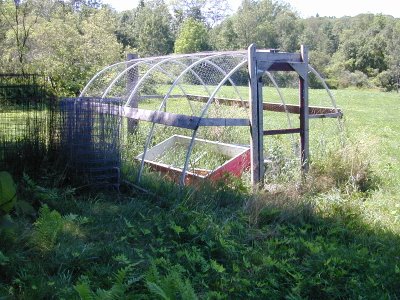
The chickens I am doing with Heidi this year will also be day-ranged. Last year Judy and I built a new pen for the chickens that we think worked well. In this picture it’s missing a tarp that would cover it if there were chickens living it. It’s bottomless and made on wooden runners. It needs a truck to pull it to new pasture space. It was moved about once per week to fresh pasture. By substituting clear plastic for the tarp, this pen can be also be used as a greenhouse to start seedlings in spring. The red thing inside is actually a cold-frame.
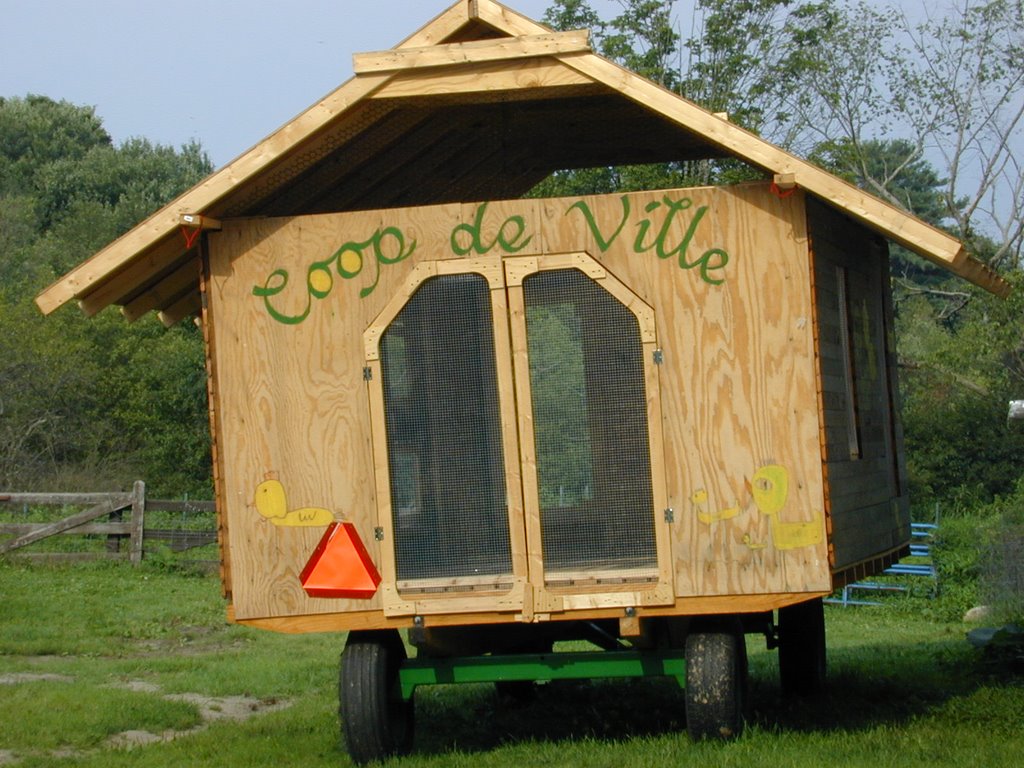
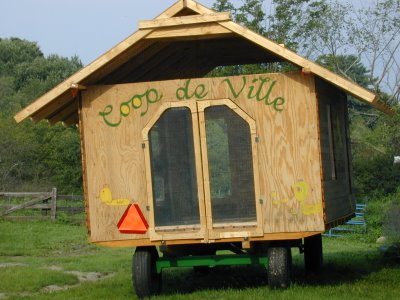
Below is the pen that was built for the chickens Heidi and I will do his year. It’s quite fancy and I heard it won a trophy in the local 4th of July parade. I think it’s solidly built and with its real wheels is very transportable. One change that I think I would have made if it were my pen, is that I would have not built a solid floor. A bottomless pen needs no shoveling out. I think I’d prefer to let gravity do the work of manure spreading. This year’s chicks haven’t arrived yet so I can’t really say how much cleaning out it will need. Things never go exactly as predicted anyway and time will tell what Heidi and I think worked well and what might be changed.
The new chicks are scheduled to arrive this week and I must say I’m excited and look forward to learning more about raising broilers on pasture. They are White Rocks. In the past I raised Cornish Cross chickens and I’m really curious as to the differences between the two breeds.
Wednesday, August 09, 2006

Tomatoes

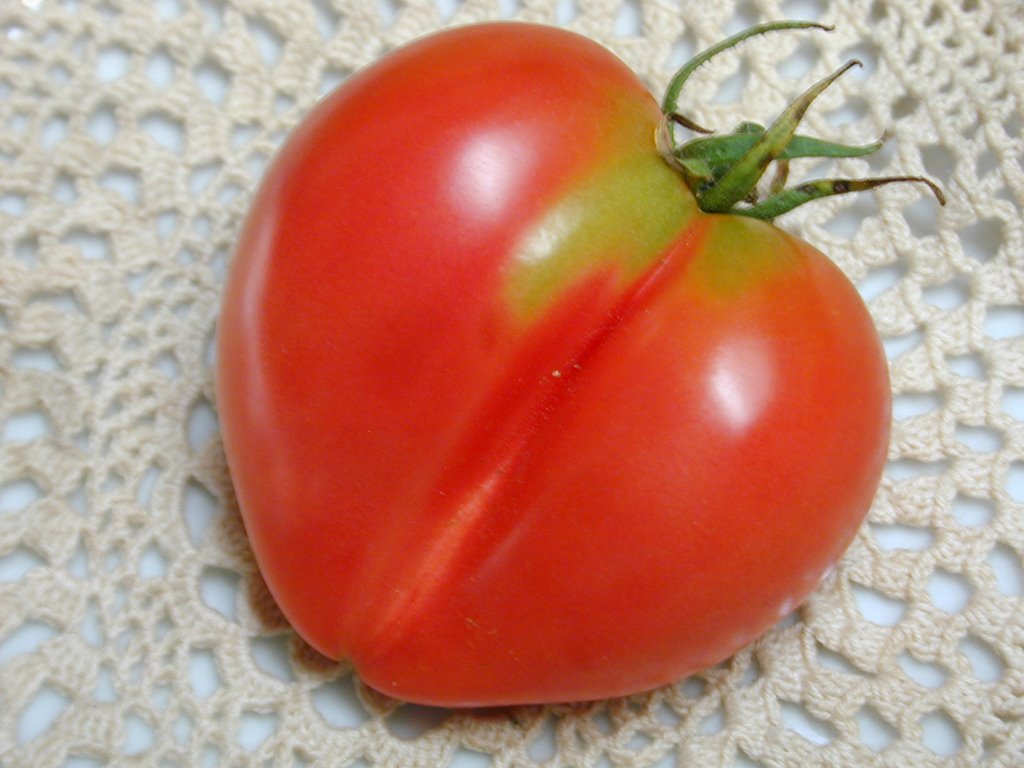
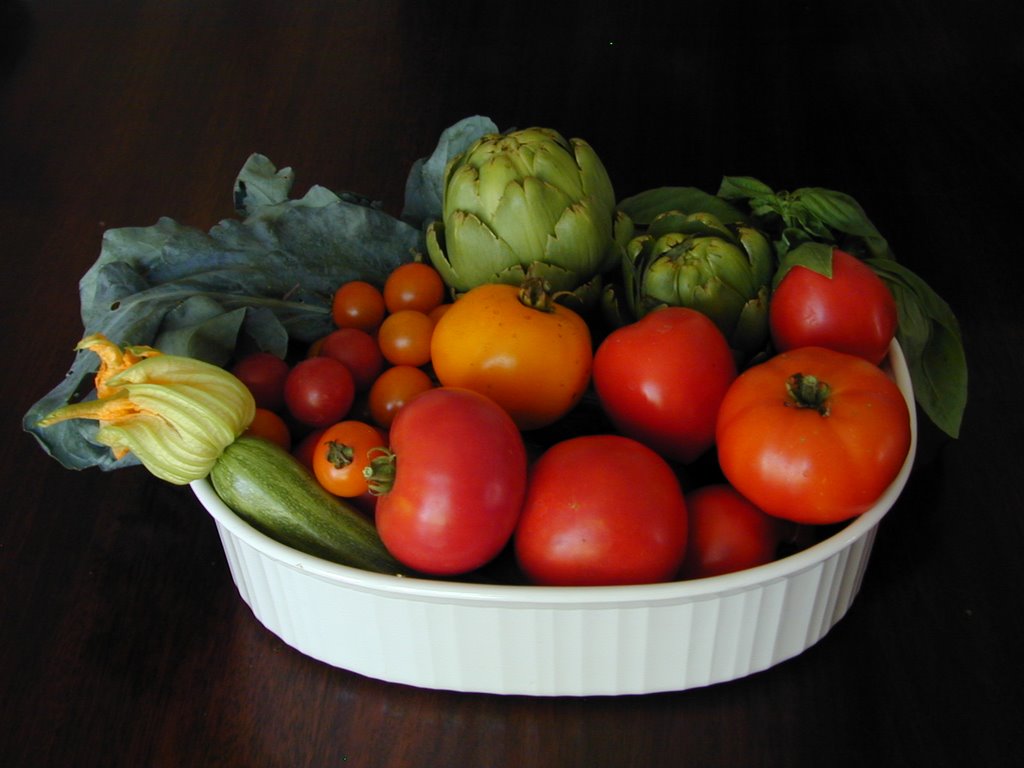
If I could only grow one thing in my garden, it would be tomatoes. I've been eating them everyday for the last few weeks and also giving many away. Last night I picked about 12 lbs and made them into sauce to freeze. This year I've planted 50 plants in 14 varieties. Some of the heirlooms like Brandywine and the purples aren't quite ready yet. If I could only plant one type, I'd actually have to choose Early Girl for it's good taste, good and early yield and medium size. I really like Brandywine too but it is a late tomato in my garden. I'm also really enjoying Sungold a lot. It's an orange cherry tomato. I thought I only liked red tomatoes, but Sungold has changed my mind. The varieties that I planted this year are;
betterboy
black prince
brandywine
cherokee purple
costoluto fiorentino
earlygirl
matts wild
old german
ox heart
parks whopper
unlabeled mystery (turned out to be a medium orange tomato)
sungold
supersonic
sweet100

Sunday, August 06, 2006

Spigariello

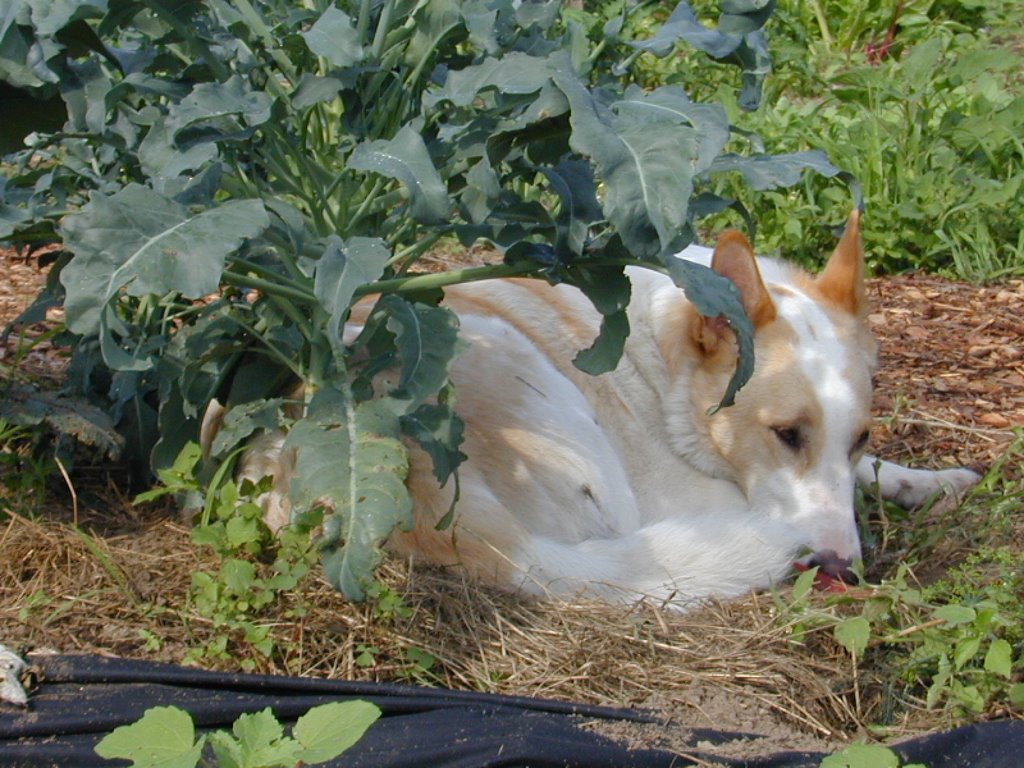
Today is Weekend dog blogging over at Sweetnicks. Check it out


Spigariello in the field (no the dog is not named spigarello)


Spigariello with some of today's harvest


Spigariello serving suggestion (just kidding. It needs cooking. )

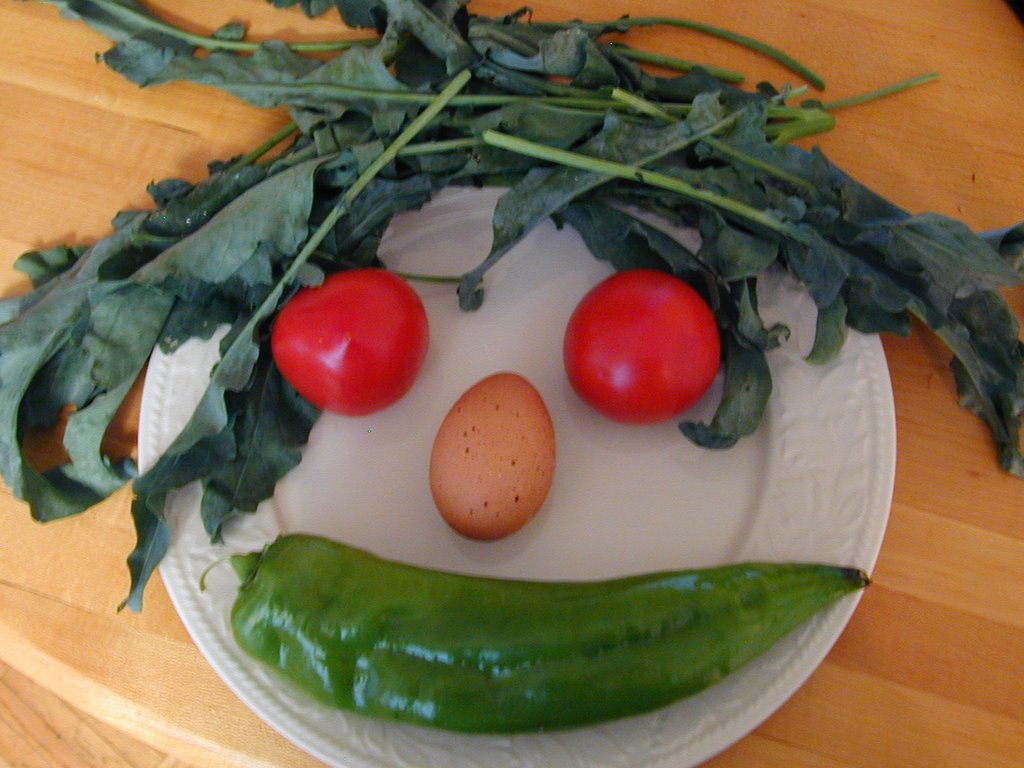
Spigarello is a new vegetable for me this year. A friend gave me some seeds and I tried them even though I'd never actually eaten spigarello before. It turned out to be easy to grow and tasty. I planted it the same time as I planted broccoli. For cooking separate the leaves and stems and only cook the leaves. The stems are too tough to bother with. To me it tastes kind of like kale, but also with a definite broccoli taste. It is supposed to form little florets, but mine didn't. I'm guessing that might be because it's been too hot. I'm planning on freezing any extra I have for winter soups and growing it again next year. In the meantime it's been producing for weeks.